Cavern Quest
A competition module
for AD&D play
Written by Bill Fawcett
PLAYERS' INTRODUCTION
CAVERN QUEST is designed to test
your skill as a dungeoneer and your
knowledge of ADVANCED DUNGEONS
& DRAGONS® rules. There are
a limited
set of responses to each situation encountered
in each room along the way,
and you are to choose what seems to be
the best reaction to what you are facing.
The best thing to do is not a constant; it
will vary as your situation changes.
It is not possible to complete the quest
(close the doors) without sustaining
some damage. In certain cases, the best
choice may be one which will minimize
the damage taken, but cannot prevent
damage altogether. Spells will function
only in the room where they are cast.
Magic items found during the quest will
work anywhere in the dungeon.
CAVERN QUEST can be used in competition,
with a point system to allow the
judge to accurately record the performance
of each player. Points are gained
for the following:
Five points for successfully closing
the doorway.
One point for each Fire Opal retained
intact, up to a maximum of 6 (the number
of opals needed to seal the doors).
One point for each room successfully
entered.
One point for every spell (personal or
scroll) still unused when the gate is
sealed.
One point for every hit point left when
the doorway is sealed.
Points are deducted for the following
occurrences:
Five-point penalty for being killed.
One-point penalty for each Fire Opal
destroyed; the player does not get credit
for having obtained an opal unless it is
kept in his or her possession until the
doors are sealed.
Any ties which occur after all points
are tabulated should be resolved by
comparing the players' performances
against the list given above, and using
each requirement, in the order given, as
a tie-breaker. For instance, a player who
successfully closes the doorway places
ahead of one who didn't. If both (or
neither) closed the doors, then their
numbers of opals are compared. If they
have the same number of opals, they aer
judged on how many rooms each player
entered, and so on down the list.
Cavern Quest character description
Name: Orlowson
Race: Half-elf
Class: 4th-level fighter/4th-level
magic-user
Armor & shield: Chain mail, large shield +1
Weapons: Dagger +3,
Longsword +1 (detects gold & silver at 20' radius)
Spells taken: Hold Portal
Protection from Evil
Spider Climb
Invisibility
Strength
Spells from scrolls: Wall of Stone
Fireball (7-dice)
Miscellaneous equipment:
Sprig of garlic
Vial of holy water
Rations for 5 days
Backpack
20-foot rope
2 torches
Hooded lantern
Small sack
Tinder and flint
6' pole
Spell book
Opals gained: <box> <box> <box> <box> <box> <box>
Hit Points: <box> <box> <box> <box> <box> <box> <box>
<box> <box> <box>
<box> <box> <box> <box> <box> <box>
<box> <box> <box> <box>
(20 hit points to start; mark off as damage is taken)
| - | Preparations | Actions |
| Room 1 | A-1, A-2, A-3, A-4, A-5 | A-11, A-12, A-13, A-14, A-15 |
| Room 2 | B-1, B-2, B-3, B-4, B-5, B-6 | B-11, B-12, B-13, B-14, B-15, B-16 |
| Room 3 | C-1, C-2, C-3, C-4, C-5, C-6 | C-11, C-12, C-13, C-14, C-15, C-16, C-17 |
| Room 4 | D-1, D-2, D-3, D-4, D-5, D-6, D-7 | D-11, D-12, D-13, D-14, D-15 |
| Room 5 | E-1, E-2, E-3, E-4, E-5, E-6 | E-11, E-12, E-13, E-14, E-15 |
| Room 6 | F-1, F-2, F-3, F-4, F-5, F-6 | F-11, F-12, F-13, F-14, F-15 |
| Room 7 | G-1, G-2, G-3, G-4, G-5, G-6 | G-11, G-12, G-13, G-14, G-15 |
| Room 8 | H-1, H-2, H-3, H-4, H-6 | H-11, H-12, H-13, H-14, H-15 |
| Room 9 | J-1, J-2, J-3, J-4, J-5, J-6, J-7 | J-11, J-12, J-13, J-14, J-15 |
| Room 10 | K-1, K-2, K-3, K-4, K-5 | K-11, K-12, K-13, K-14, K-15 |
| Room 11 | L-1, L-2, L-3, L-4, L-5, L-6 | L-11, L-12, L-13 |
| Room 12 | M-1, M-2, M-3, M-4, M-5, M-6, M-7 | M-11, M-12, M-13, M-14, M-15, M-16 |
| Room 13 | N-1, N-2, N-3, N-4, N-5, N-6, N-7 | N-11, N-12, N-13, N-14, N-15 |
| Room 14 | O-1, O-2, O-3, O-4, O-5, O-6 | O-11, O-12, O-13, O-14, O-15 |
| Room 15 | P-1, P-2, P-3, P-4, P-5, P-6 | P-11, P-12, P-13, P-14, P-15 |
| Room 16 | Q-1, Q-2, Q-3, Q-4, Q-5, Q-6 | Q-11, Q-12, Q-13, Q-14, Q-15 |
| Room 17 | R-1, R-2, R-3, R-4, R-5, R-6, R-7 | R-11, R-12, R-13, R-14, R-15, R-16, R-17, R-18 |
| Room 18 | S-1, S-2, S-3, S-4, S-5, S-6, S-7, S-8 | S-11, S-12, S-13, S-14, S-15 |
| Room 19 | T-1, T-2, T-3, T-4, T-4, T-5, T-6 | T-11, T-12, T-13, T-14, T-15, T-16, T-17, T-18 |
| Room 20 | U-1, U-2, U-3, U-4, U-5, U-6 | U-11, U-12, U-13, U-14, U-15 |
THE SITUATION
You have the sinking feeling that you
have been set up. Before you sits a
council of the Patriarchs of Felker.
Among them is the man who had earlier
directed you to wait in the room you have
just been dragged from. His expression
flickers between satisfaction and contemplation.
In a sonorous voice, a petty
clerk is reading the verdict -- guilty, of
course.
Your attention is suddenly riveted on
the stout official when he begins reading
the sentence. You had been expecting a
fine or perhaps a term in the local jail. His
voice continues: "Should the convicted
party, Orlowson, survive the several tortures
listed here, he is then to be drawn
and quartered by a team of the largest
and stoutest mares that can be found in
the city. Whilst this is occurring, he will
further then be simultaneously subjected
to the touch of seven blest irons heated
to a red glow."
"So shall it be," intone the patriarches
in unison.
You tense, deciding it is better to die
now fighting your captors than to meekly
stand by and be mangled. Poised to
spring at the guard to your left, your
muscles freeze as the cleric who originally
led you into this disaster utters one
soft word . . "Unless.. ." he says, smiling
expectantly.
"There is a mission that you could take
that would, if successful, fully atone for
your impertinent presence in the Sacred
Chamber. To the west of this city, but
half a day's ride, is a cavern. This cavern
is suspected to have been made ages
ago by an evil warlord who had plans for
invading this valley. It is said to exit upon
the dark realms beyond the mountains,
and the doors which offer escape from
within the cavern also offer entrance to
all manner of fearsome beasts from the
realms beyond. The few who have entered
hoping to close the gates seem to
have failed, and nothing is known of their
fate.
Should you volunteer to attempt this
task, braving the many dangers between,
and then succeed, you shall be freed and
receive great rewards. We clerics of the
temple would endeavor to go forth ourselves,
but a powerful enchantment cast
by the lich that once dwelled there prevents
this. Will you accept this challenge,
or. . .?"
At the far end of the temple square you
notice something that bears an amazing
resemblance to Sacred Irons being
heated. A further glance at the expectant
crowd, and you agree to their terms. Besides,
you admit to yourself, you have to
admire how well you were set up.
Later, as you are being led to the stables,
the Patriarch who tricked you into
committing the sacrilege which got you
into this mess appears beside you. In a
friendly, almost apologetic, voice he
gives you advice about your upcoming
quest.
"Many have gone before," he warns,
"who were well armed and skilled as
you. None have returned. The way is
long and hazardous with many creatures,
summoned or created by the lich,
still dwelling there. Along the way you
will find some of the fire opals which are
needed to envoke the enchantment
which will seal the gate forever. You
must gain possession of at least six of
the opals and place them in the hexagon
at the center of the gate while chanting in
high elvish:
By Gax and Bloom, by Banner and
Dunne,again be closed. By the Duke and
Avalon's strength be sealed forever.
"The gate will then swing closed and,
so they say, never open again.
"Use your magic wisely and use only
that which you need. You must always
move forward and never turn back even a
pace until the quest, or you, is finished.
Take with you this scroll of two great
spells, along with our hopes for your
success."
ROOM 1
After entering the cavern, you hear the
guards who escorted you taking up posts
outside the door, preventing you from
immediately escaping. With a sigh, you
begin walking down the twisting cavern.
After a few minutes the walls of the cavern
become more regular and the stalactites
disappear from the ceiling. You
seem to be entering an area tunneled out
of the rock. Ahead of you a doorway is
visible, and through it you can see the
flicker of torchlight.
When you look into the room, you see
that it is a chamber approximately 30' x
30' x 20' high. The floors and walls are
grey rock, except for a patch of black 6
feet across in the center of the room. On
this patch of black is a chest. Your sword
detects silver in the chest.
On each wall is a torch. These
four
torches seem to have been recently lit,
although no one is visible in the room.
On the far wall is a door with a table next
to it. On the table are what appear to be
several sheets of paper. One is rolled up
and sealed with wax, apparently a scroll.
Another paper appears to have been partially
burned. There is a scorched area
directly in front of the table.
The breeze coming into this room from
the doorway ahead tells you that this is
the path to follow.
Preparations (choose one)
A-1: Take out sprig of garlic.
A-2: Light your torch.
A-3: Throw in a fireball,
then cross.
A-4: Draw your sword.
A-5: Take out vial of holy
water.
Actions (choose one)
A-11: Cross to door and exit, avoiding
chest and table.
A-12: Examine and open chest, remove
silver.
A-13: Examine all open papers on the
desk, but not the scroll.
A-14: Open and examine scroll.
A-15: Attempt to remove one of the lit
torches from its holder.
ROOM 2
After leaving the first room, you continue
down the corridor for nearly 150
feet. Along the way you notice a broken
holy symbol of your own lawful good
religion. It seems to have been smashed
with a mace or sword.
Traveling on, you approach a doorway
with a large oaken door swung open.
The sound of arguing voices is audible
from within. Peeking around the doorway
into a room 20' x 20', you see a
group of four men sitting around a small
campfire. They seem to be arguing about
some item that they are grabbing from
each other.
In the far left corner of the room is a
man who shows visible signs of having
been tortured. He is hung from the wall
by his wrists. His head is drooped onto
his chest, and he doesn't appear to be
moving or making a sound.
In the back right corner is a chest, partially
open with several jewels visibly
glinting in it. As you prepare to act, one
of the men arguing stands up and begins
moving toward the door. He is wearing
the cloak, helm, and armor of a lawful
good paladin. The other three men
stand
and begin to follow him, sounding angry
and speaking in a language unfamiliar to
you.
Preparations (choose none or one)
B-1: Slam door and cast Hold
Person on it.
B-2: Cast Strength on self.
B-3: Rush past door and further into
cavern, hoping to evade the group of
men altogether.
B-4: Cast invisibility
on self.
B-5: Cast Protection
from Evil on self.
B-6: Draw your sword and breathe deeply.
Actions (Choose one or two)
B-11: Step into the door and offer to
assist the paladin.
B-12: Step back from the door and
strike any who exit.
B-13: Throw fireball
into the room after
yelling,Duck! in Lawful Good.
B-14: Rush into the room swinging,
drive away the men and take possession
of the chest.
B-15: Call on those who are in the
room to surrender in Common tongue.
B-16: Throw holy
water on the first
man to exit the room.
ROOM 3
You walk down a series of winding
passages that gradually lead downward.
The walls become rougher and more
natural-looking, but the floor remains
smooth. Along the way, you notice a few
shells and some driftwood on the floor.
Careful examination of the walls reveals
a high-water mark about six inches above
the floor. Several hundred feet further
on, the floor becomes sandy, and shortly
later the passage opens into a cavern.
The cavern is a dome nearly 50' across
and about 15' high. Flowing in through a
rusted iron grate in one wall is a stream
more than 15' wide and too deep to see
bottom. The water is visibly moving and
exits through a similar grate in the opposite
wall.
The floor of the cavern is made of worn
stone slabs lightly covered with sand. All
cracks between the slabs are also sand-filled.
Steps beginning a few feet above
water level lead down into the
stream
and disappear into its depths. These appear
worn by the passage of many feet.
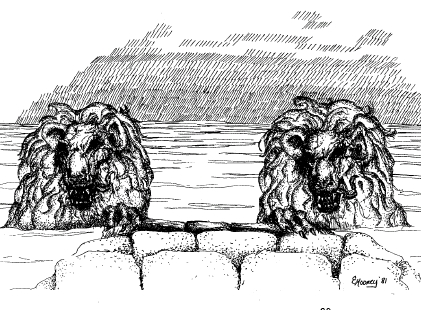
On either side of the steps are large lion-statues
whose bodies extend out from
the water. Only the heads and front legs
of the statues are visible above water
level.
On the left wall is a ladder that leads
part way up the wall and then stops. It is
made of iron pegs sunk into the stoen. A
small altar or table is next to where the
steps ascend from the stream on the opposite
side. A fresh breeze can be felt
entering from an open doorway on the
far side of the cavern. There is no way to
reach this doorway without crossing the
stream which flows across the center of
the cavern. Your armor is too heavy to
allow you to swim in it.
Preparations (choose none, one or two)
C-1: Strip off all your armor and throw
it across the stream.
C-2: Pour holy water into the stream.
C-3: Get out your sword and attempt
to jump the stream.
C-4: Cast Strength on self.
C-5: Get out your rope.
C-6: Get out one day's rations (needed
for C-16)
Actions (choose one or two)
C-11: Attempt to swim
across the
stream without wearing any armor (assumes
you chose C-1).
C-12: Toss loop of rope around altar
on far side of stream, attach otehr end to
one one of the lion-statues, and pull yourself
across stream while wearing armor.
C-13: Cast Spider
Climb on self and
cross using the ceiling.
C-14: Cast invisibility
on self and swim
across (assumes you chose C-1).
C-15: Before crossing, climb
up the
ladder as far as possible.
C-16: Throw rations into the water and
then attempt to cross.
C-17: Search for secret passags, then
attempt to swim across (assumes you
chose C-1).
(Note: Some of the actions are mutually
exclusive. Choose only one method of
crossing the stream.)
ROOM 4
You are in another section of finished
passages. These tunnels are nearly 20
feet wide and over 15 feet high. As you
walk, you find several types of bones, all
of which are broken, and a few seem ot
be scorched. A few of the bones are nearly
6 inches thick and appear to have been
snapped off. After about 120 yards you
notice a scorched spot on the side of the
tunnel. A further look reveals the blackened
skeleton of an elf and a pile of partially
melted armor in the center of the
scorched spot.
Further down the tunnel you find a
similar spot containing three human skeletons
and armor, also scorched and
melted. In one sandy spot you find a partial
footprint of a large reptile.
A few yards beyond the footprint is a
splatter of greenish blood. It is only partially
dry. Traveling on carefully, you
continue until you notice a large opening
on the left wall. This opening is 8'
high and 15' wide. You hear sound from
within, made by the movement and heavy
breathing of a large creature.
The funnel continues for several yards
past the opening and then turns right. A
breeze is felt coming from around the
corner. A stench of brimstone (sulfur)
comes from the cave on the left.
Preparations (choose one)
D-1: Take out a sprig of garlic.
D-2: Light a torch.
D-3: Throw Fireball
into the cave.
D-4: Cast Wall
of Stone across cave
mouth.
D-5: Take out vial of holy water.
D-6: Cast Invisibility
on self.
D-7: Cast Protection
from Evil on self.
Actions (choose one)
D-11: Cross the cave mouth carefully
and continue onward.
D-12: Rush into cave and attack.
D-13: Throw holy
water into the cave
as you rush past the opening.
D-14: Throw a day's rations in front of
the cave; see what comes to eat them.
D-15: Enter the cave, speaking in a
friendly tone.
ROOM 5
You continue down a winding passageway.
The walls become rougher and
more natural-looking as you progress.
Moving carefully, you observe two things
occurring simultaneously: The cave narrows
until it is 5' wide and barely tall
enough for you to stand up in, and lichens
appear on the now-damp walls.
These lichens give off a dim light which
makes your torch unnecessary.
After
putting out the torch so as to not attract
undue attention, you continue. After a
few more minutes of skulking along, you
see in the lichen-light that the corridor
opens out into a 20' x 30' cavern.
Crouching, you peer into the gloomil
lit cavern. Across from you, 30 feet away,
the corridor continues. Along the walls
on either side are fastened a double row
of bunk beds held up by rusty chains. At
least a dozen of these are occupied by
skeletons who appear to be unmoving.
In the hand of each skeleton is a short
sword which rests across its chest. Each
is also wearing a necklace of a silvery
material.
About four feet in front of you is a
sturdy-looking table, 7' long with a top
made of a 3' slab of oak. On the table is a
small (4" x 6") chest, a flail made of
copper, and a silver battleaxe.

You throw a pebble toward the nearest
bed, disturbing the skeleton. It begins to
rise.
Preparations (choose none or one)
E-1: Draw your sword and your holy
symbol.
E-2: Get out a vial of holy
water (needed
if E-11 is chosen below).
E-3: Cast Strength
on self (needed if
E-14 is chosen below).
E-4: Throw Fireball
into the room.
E-5: Cast Protection
from Evil on self.
E-6: Light a torch.
Actions (choose one)
E-11: Throw holy
water on the nearest
skeleton and grab the chest as you rush
through the room, ignoring the other
skeletons.
E-12: Pick up the silvered
battleaxe
and fight your way through the room,
grabbing the chest as you pass it.
E-13: Pick up the flail and fight your
way through the room, grabbing the
chest as you pass it.
E-14: Pick up the oak table, intending
to use it to batter any skeletons
that approach
you, then check the chest, etc.
E-15: Stand in the doorway you are in
and prepare to swing on the skeletons
one at a time (if necessary) as they try to
fight you; then check the chest and
search the room.
ROOM 6
You continue down the corridor carefully,
staying near the right side to take
advantage of the shadows. The corridor
seems to stretch on forever: eventually
you notice that it is curving slightly to the
right. Suddenly, ahead of you, the way
appears blocked. The tunnel has collapsed
recently, judging by the now-exposed
surfaces which do not contain
the ever-present lichens.

A slight stirring of the dust guides your
attention to a small opening that remains
clear at the top of the rockfall. Climbing
onto the loose rock, you look down the
tunnel that remains. The way is dark,
since the lichens haven't spread into this
area yet, and the passage appears to be
about 3' in diameter and 15' long. There
is light visible at the far end, and while
you watch a shadow passes before the
opening. A wall is visible more than 25'
beyond the lighted opening.
You creep through the small tunnel
and approach the opening, then decide
to wait for more clues about what lies
ahead. Your patience is rewarded with
some overhead scraps of conversation.
The words are hard to understand, but
you easily recognize the gutteral speech
of trolls.
Preparations (choose one)
F-1: Throw a Fireball
into the room and
proceed.
F-2: Cast Strength
on self.
F-3: Cast Invisibility
on self.
F-4: Light a torch; keep it ahead of you.
F-5: Cast Protection
from Evil spell on
self.
F-6: Throw a flask of oil into the room,
throw a torch on it to light it,
and then
enter the room.
Actions (choose none, or up to three)
F-11: Rush in swinging.
F-12: Attempt to sneak through the
room ahead.
F-13: Attack any trolls
by any means
available and then search the area.
F-14: Burn the remains of any trolls.
F-15: Approach the trolls
in a friendly
manner, offering them food.
ROOM 7
You exit the trolls' room through
a
door on the left wall and find yourself in a
brick corridor. The corridor extends for
several hundred feet, with nothing to
break its monotony but the gentle shuffling
sound of your boots. Pausing, you
hear only deep silenece, which you try not
to think of as "deathlike."
Finally, the corridor ends in a short
ascending stairway. At the top of the
stairs is a door. Checking for traps all the
while, you climb the thirteen steps to the
landing in front of the heavy wooden
door. Though there were no footprints
on the steps, there is a jumble of prints
on the landing. These seem to have been
made by a soft boot or padded foot.
The door has brass hinges, with a
twisted rope for a handle. There is no
lock and it opens easily.
Inside is a room that is 20' x 20' with a
10' ceiling and an exit on the far side
similar to the door you entered through.
On one wall is an open closet and on the
other a small table with several jars of
different colored creams, three small
brushes, and a mirror. In the closet you
find an orange-and-red shirt, a pair of
green pants, a wooden scepter painted
silver, and a pair of soft leather boots
with what seem to be runes engraved
into their surface.

While you are looking in the closet,
you begin to hear vocies. At first the voices
are unclear, but soon they are louder
and closer, and you recognize the speech
of orcs. There seems to be at least
three
of them. They sound as if they are approaching
the room at a walk and are
unaware of your presence.
Preparations (choose one)
G-1: Quickly put on the shirt and
pants, and strike a pose as if you belong
there.
G-2: Quickly put on the boots (there is
not enough time to put on every available
article of clothing).
G-3: Pick up the scepter.
G-4: Cast invisibility
on self.
G-5: Cast Spider
Climb and ascend to
ceiling.
G-6: Get behind the door so as to gain
surprise.
Actions (choose one)
G-11: Attack orcs
as they enter.
G-12: Flee out the door you entered.
G-13: Attempt to hide from orcs.
G-14: Act friendly and try to bluff it out.
G-15: Throw holy
water on the orcs as
they enter.
ROOM 8
After discarding the equipment (if any)
picked up in the previous room, you pass
through the door the orcs entered.
The
corridor bends to your left after a few
feet. You proceed carefully, but with
growing confidence. Then, after walking
thirty or forty feet further you fail to notice
a weighted panel that extends across
half of the corridor floor. When you step
on the panel, a section of the wall on
your right quickly slides down into the
floor. The area behind the wall is very
dark. Visible inside it are four sets of
glowing red eyes, each about two feet
above the ground. These seem to be
moving towards you. As you prepare to
take action, you hear scuttling noises
coming from the darkness.
Preparations (choose none or one)
H-1: Throw a Fireball
into the area.
H-2: Light a torch.
H-3: Get out your holy water (needed
for H-11 below).
H-4: Cast Protection
from Evil on self.
H-5: Get out five days rations (needed
for H-12 below).
H-6: Cast Hold
Portal on entrance.
Actions (choose one)
H-11: Throw holy
water on the nearest
set of eyes and fight it out.
H-12: Throw the food
to one side and
fight it out, if this action doesn't divert
the attackers.
H-13: Enter the darkness and fight it out.
H-14: Continue running down the hall.
H-15: Get out your holy symbol and
order the eyes away.

Continuing down the corridor, you
come to a second stairway leading up.
This one also has 13 steps bbut ends at a
silvery, metal door. Again, the door isn't
locked, but leaning against it is a human
skeleton whose bones seem to have
been decayed even before its death.
Checking for traps, you find none and
then open the door. Inside is a large
room, 60' by 60' with a domed ceiling 40'
high in the center. Set in the five corners
of a golden pentagam inscribed in the
obsidian floor are five sarcophagi. There
is an exit directly across from where you
are standing.
Suddenly, mummies begin to rise from
each of the coffins. They begin moving
toward you, and fleeing seems to be the
best reaction. But just as you prepare to
run, you notice that one is wearing an
opal around his neck on a silver chain,
and your plans change abruptly. You
have about one melee round before the
closest mummy will reach you.

Preparations (choose none or one)
J-1: Cast Protection
from Evil on self.
J-2: Get our your holy
water (needed
for J-11 below).
J-3: Try to fry them all with a Fireball.
J-4: Put on the sprig of garlic.
J-5: Get out the holy symbol.
J-6: Cast Spider
Climb on self.
J-7: Get out your vial of oil (needed for
J-13 below).
Actions (choose one)
J-11: Stand and fight it out, after throwing
holy water on the one wearing
the
opal.
J-12: Avoid the mummies
and head for
the far door.
J-13: Hit one with the
oil and light it,
then fight the others with your sword,
trying not to damage the opal.
J-14: Present holy symbol strongly
and say, "Begone!"
J-15: Fight it out with the dagger rather
than the sword.
ROOM 10
The hallway beyond the mummy room
is decorated with Egyptian art
and hieroglyphics.
Further on, the decorations
are a stylized pattern of tiles in geometric
desings. The 10-foot-wide hall is straight
for several hundred yards.
Eventually you come to an alcove with
a small altar in it. This altar seems to be
dedicated to one of the Greek gods, perhaps
Demeter judging from the grain offering
you find on it. After finding nothing
of value in the alcove, you continue.
In the next few hundred yards you
find three more alcoves obviously dedicated
to Ceres, Pan, and Apollo. In the
wall behind the one dedicated to Apollo
is a small panel. Carefully opening the
panel with your sword tip, you see an
opal. All seems quiet, maybe too quiet.
The opal appears to be merely sitting on
a velvet pad about 18 inches inside the
wall. Next to the opal and the pad is a
liquid-filled hole wide enough to allow
the opal to drop into it. If your aren't careful
it appears likely the opal could fall
into the hole and be lost. You carefully
push a pebble into this hole -- and it
immediately dissolves, along with the tip
of the sword you were pushing it with.
The panel is just wide enough to fit your
arm into.
Preparations (choose one)
K-1: Cast Spider
Climb on self.
K-2: Cast Strength
on self.
K-3: Get out holy
water (needed for
K-11 below).
K-4: Take off your gauntlet (needed
for K-13 below).
K-5: Cast Hold
Portal on the panel to
lock it closed.
Actions (choose one)
K-11: Dump the holy
water out into the
panel.
K-12: Try to edge the opal out using
your sword.
K-13: Reach in and take out the opal
using your hand.
K-14: Purposely push the opal into the
liquid next to it.
K-15: Walk away and forget the whole
thing.
ROOM 11
You continue down the hallway, passing
three successively smaller, empty
niches, before coming to a doorway
blocking the corridor. After several minutes
of trying to open the door, you realize
it must be a false doorway. Worrying
about alarms you may have tripped, you
search hurriedly for a secret door
or
panel. All is still peaceful when you discover
the last contains a secret
entrance. Fearing discovery, you quickly
trip the now-obvious latch and rush down
the stairway on the other side.
At the 100-foot mark the tunnel bends
sharply to the left. Rounding the corner,
you see two things. The first is a skeleton
with a dagger sticking out from the
bones of its back. The second is that
after just a few more steps the corridor
seems to dead-end. Approaching the
skeleton, you see three stones -- one
transparent, one iridescent, and one a
pale lavender -- whirling about the skull
of the dead adventurer. A quick survey of
the tunnel's end finds no secret doors.
You have just turned back to examine
the whirling stones when you detect the
acrid odor of chlorine. A wall of green
gas rounds the corner and moves swiftly
toward you.
Preparations (choose one)
L-1: Hold
your breath.
L-2: Grab the clear stone
and set it
whirling about your head.
L-3: Grab the iridescent stone
and
set it whirling about your head.
L-4: Grab the pale lavender stone
and
set it whirling about your head.
L-5: Drink your holy
water.
Actions (choose one)
L-11: Run through the cloud and back
up the corridor until you clear the gas.
L-12: Stand there in great pain and try
to outlast the gas.
L-13: Search further for a secret door.
All of the stones will turn
grey and dull
(useless) immediately after you leave the
corridor where the gas is.
ROOM 12
You realize that the only way to proceed
is through the door you found earlier
on the side of the corridor. You backtrack
and open that door, finding yourself
in a large cavernous area. The cavern
seems to be over 100 feet in diameter
and the ceiling towers nearly 50 feet
above. Barely visible in the ceiling is a
grating covering what appears to be a
smoke-smudged vent hole. No light
visible through the hole. In the distance
you can make out several items and
beyond them another doorway.
As you approach the items, one seems
to be glowing slightly inside. This turns
out to be the furnace for a smithy. You
are able to see that to the left of the
doorway are stacked and scattered several
boxes, each about four feet long and
two feet wide and tall. Partially visible
beneath a stack of boxes is what appears
to be a map or scroll. The hardwood
boxes are sealed with what seems to be
either a rune or the personal seal of the
smith in wax.

To examine the map/scroll more closely,
you move one box slightly. The stack
shifts, breaking one of the wax seals.
Almost immediately the lid of that box
begins to open. You stand amazed as a
perfectly formed and obviously functional
iron figure of a warrior steps out. If
it weren't so small, you would think the
creature a golem. When the iron figure
casually pushes aside a beam weighing
half a ton, you begin to get worried. A
miniature iron golem.
The creature moves directly toward
you at a slow but determined pace, between
you and the next door. Looking
closely as it nears, you see the monster
appears to be already damaged and
limps slightly.

Preparations (choose one or two)
M-1: Draw sword (needed for M-11,
M-12; cannot also choose M-2).
M-2: Draw dagger (needed for M-11,
M-12; cannot also choose M-1).
M-3: Get out the holy
water (needed for
M-12).
M-4: Cast Protection
from Evil on self.
M-5: Cast Invisibility
on self.
M-6: Light a torch
(needed for M-15)
M-7: Hold
breath while fighting.
Actions (choose one)
M-11: Engage the creature in combat.
M-12: Throw holy water on
the creature
and rush past.
M-13: Run around the creature and
engage it in passing with whatever weapon
you have.
M-14: Attempt to hide and evade until
you can escape.
M-15: Throw oil and light it with a
torch.
M-16: Throw a Fireball at the
monster.
ROOM 13
After passing through the unexplored
doorway, you find yourself in a narrow
corridor. The narrow walls of the corridor
nearly touch your shoulders, and the
walls seem to have been made of crude
bricks. The floor is made of natural rock
and it appears to be very worn in the
center, as if thousands of feet had walked
down the exact center of the path over
the years. While standing and listening
for the sound of any danger ahead, you
hear footsteps approaching. They seem
near, but you see nothing ahead of you.
Instinctively you put your shield up and
rush forward. After only a couple of paces
you bump into something you cannot see,
but you sense that it is man-sized.
Whatever it is lets out a grunt, and then
you hear a sound as if it has fallen over
backwards. Your sudden action seems
to have surprised whatever is
ahead of
you. The sound of panting, as if someone
has had the wind knocked out of
him, comes from close ahead.
Preparations (choose one)
N-1: Cast Strength
on self.
N-2: Get out holy
water (needed for N-11)
N-3: Get out dagger (otherwise, sword
is considered to be in hand).
N-4: Cast Protection
from Evil on self.
N-5: Cast Invisibility
on self.
N-6: Take no special action.
N-7: Get out rations (needed for N-15).
Actions (choose one)
N-11: Throw holy
water in the direction
of the panting.
N-12: Move forward swinging.
N-13: Attempt to talk with whatever is
head of you.
N-14: Try to hide from the threat.
N-15: Throw rations to one side of the
corridor and try to flee past the distracted
monster.
ROOM 14
After another 100 yards of travel, the
narrow tunnel opens into a wide natural
cavern. The floor of the cavern is covered
with dust. In the dust can be seen
the footprints of a dragon. After following
the cavern (and the footprints) for
another 200 feet, you come to a larger
cavern. The cavern is too long to be seen
in full and is at least 150 feet wide. Barely
visible at the distant end is an opening.
On the left side of the cavern is a lake
which seems to extend out below the
level of the cavern. Near the edge of the
lake, which fills over a third of the floor
space, is what appears to be a large pile
of metal coins. Starting to approach with
care, you see the dim reflection of a large
coppery or bronze object at the top.

When you get near enough to make
out details, you realize that there is a
dragon sitting on top of
what your sword
tells you to be a pile of gold and silver.
The dragon appears to be asleep. Just in
front of its jaws you notice the familiar
glint of a fire opal. This one appears to be
hanging from a chain that is around the
skull of one of the dragon's earlier
victims.
Silently you approach to within 20 feet
of the sleeping dragon. Part of the chain
appears to be under one massive claw,
but the other part is temptingly close to
the edge of the pile. The dragon continues
his deep, regular breathing.
Preparations (choose one)
O-1: Light a torch
to see better.
O-2: Sneak up closer, quietly (needed
for 0-11).
O-3: Throw a Fireball
at the sleeping
dragon.
O-4: Announce yourself and try to
wake the dragon.
O-5: Move quietly away; try to continue
onward before being noticed.
Actions (choose none or one)
O-11: Strike as strongly as possible to
get the first blow while the dragon still
sleeps.
O-12: In a loud voice, challenge the
dragon to a fight for the opal.
O-13: Attempt to tie the dragon's mouth
closed, then attack.
O-14: Attempt to steal the opal without
waking the dragon.
O-15: Try to be friendly; explain your
mission and ask the dragon for the opal.

After leaving the cavern you find yourself
in a twisting, natural passage sloping
slightly upward. The cavern seems to
go on forever, and twice you are nearly
skewered by piercers. Rounding a corner,
you surprise two gnolls who are resetting
a trap. They are intent on their
work, and the first dies by your hand
without knowing what hit him. The second
is killed after a brief exchange,
without ever even coming close to hitting you.
After what you've been through
so far, the gnolls are an almost-welcome
opponent.
Examining the contents of a bag the
gnolls had dropped nearby, you find a
vaguely familiar, definitely lawful holy
symbol and what may have been a collection
of fresh spell components. Under
this are nearly 500 gold pieces, a fortune
for a gnoll.
Continuing on, watching for traps, you
pull up short at the sight of a man bound
in the corridor. He is gagged, but looks at
you imploringly. As you approach a
deep, bleeding wound in his abdomen
becomes visible. In front of him you see
two scrolls, obviously discarded as useless
(to them) by the gnolls. When you
approach the first scroll the wounded
man groans and shakes his head. The
effort causes him to pass out momentarily,
and your attention is directed to his
plight. You loosen his gag and he painfully
struggles to speak. The language is
unfamiliar to you, but he seems to be
urgently anxious for you to set him free.
While loosening his ropes you notice a
vial in a pouch at his belt. When the first
of his hands is freed, the stranger frantically
fumbles for the vial, then again
passes out.
Preparations (choose one to three)
P-1: Read the first scroll.
P-2: Read the second scroll.
P-3: Continue to loosen the ropes
binding the stranger.
P-4: Get out the stranger's vial.
P-5: Kill the stranger.
P-6: Ignore it all and continue.
Actions (Choose none, one, or two; indicate
the sequence of multiple actions)
P-11: Drink the contents of the vial.
P-12: Pour the contents of the vial
down the stranger's throat.
P-13: Free the stranger from the ropes
and move on, leaving him unconsciouse.
P-14: Kill the stranger and continue on
(cannot also choose P-12).
P-15: Search the stranger further, taking
whatever you can find.
ROOM 16
After continuing along the corridor for
several hundred feet, you are suddenly
startled by the cry of a shrieker.
This, as
you hurry toward it, is seen to be a small
one standing only two feet high.
Nervously you continue down the passage.
The cavern opens until the waalls
are more than 30 feet apart and the glowing
lichens on the wall begin to thin out.
You are less surprised to discover another
shrieker in the half-light. This one is
nearly 5 feet tall and lets out with a
bassoon-like noise.
Beyond, in the dim light, you see several
more mushroom-shaped fungi and a
few that seem to have short branches
bunched close to their base. For most of
the way you should be able to avoid any
contact with any of the growths. Unfortunately,
at one point there is a nearly
solid wall of fungus blocking the way.
Moving up to the blockage, you
startled to notice the body of an elf just
beyond. Judging from the smell of the
rotted flesh, he must have been dead for
only little more than a week. The body is
partly clothed in robe bedecked with
symbols, making it obvious that the elf
was a spell-caster of some sort. On the
hand of the elf nearest you, his left, the
flesh appears to be rotted clear to the
bone. Clutched in this hand is a scroll,
and lying nearby is the scroll case from
which it came. Abruptly, the sound of
footsteps in the distance warn you of a
possible threat approaching from behind.
Preparations (choose one)
Q-1: Cast Spider
Climb on self (needed
for Q-11).
Q-2: Get out oil (needed for Q-12).
Q-3: Get out garlic (needed for Q-13).
Q-4: Light a torch.
Q-5: Cast Strength
on self.
Q-6: No special preparations.
Actions (choose one)
Q-11: Spider
Climb using the ceiling to
cross the barrier.
Q-12: Throw oil on the nearest section
of fungus and light it; cross when
the
flames die down.
Q-13: Push through the fungus, holding
the garlic ahead of you.
Q-14: Simply walk through, smashing
any shrieker that might yell
Q-15: Crawl through the blockage,
staying as low as possible.
ROOM 17
Once you have passed the fungus
area, your torch reveals a
stairway leading
upward for nearly 50 feet. The steps
are dusty and seem long-used. A glowing
torch, similar to the torches in Room
1, burns at the top of the stairs. On the 15'
x 12' landing, you see an ornately inscribed
brass door nearly 5 feet wide. On
the door are scenes of a wolf suckling
two babies, bunches of grapes, and men
in various types of armor fighting each
other and strange beasts.
Upon opening the door, you find yourself
in a box overlooking a large arena. At
the far end of the stadium is another box
similar to your own. Leading down from
both are rope laders that are almost
long enough to reach the stadium floor,
40 feet below. The ladder on your side
seems quite sturdy and functional.
Beneath you the rope ladder drops
down into enters a short, ceilingless corridor <grammar>.
On the wall of the corridor are visible
three doors. Each door apparently
opens into a different section of the arena,
and the areas are separated from
each other by a thick, 26-foot-tall stone
wall. Different creatures are visible in
each of the three sections, which are 50'
wide and nearly 100' long. These creatures
are all strange-looking to you but
obviously dangerous.
The first of these, on the left, appears
to be a floating ball with one large eye
and several smaller eyes on rigid stalks.
In the center area is a gigantic, bull-like
creature with metal scales; wisps of
smoke occasionally drift from its nostrils.
The third area, on the right, appears
to be a large, gross toad with man-like
arms instead of forelegs. He appears to
be gesturing or conjuring at you, with no
apparent effect, and then walks anxiously
to near the door you would enter by...
Preparations (choose one)
R-1: Get out Slow
scroll (needed for
R-14).
R-2: Offer a prayer to your god and
proceed with actions.
R-3: Cast Protection
from Evil on self.
R-4: Get out holy
water.
R-5: Cast Invisibility
on self.
R-6: Re-light your torch (needed for
R-16).
R-7: No special preparations.
Actions (choose two)
You are assumed to have climbed
down the ladder and be attempting to
cross one of the three areas. Choose one
and only one from R-11, R-12, and R-13,
plus any other single action.
R-11: Attempt to cross the left-hand
area.
R-12: Attempt to cross the center area.
R-13: Attempt to cross the right-hand
area.
R-14: Throw the Slow
spell on any
creature you face.
R-15: Throw holy
water on any creature
that comes near.
R-16: Use the torch
to fight the creature
you face.
R-17: Offer gold to the creature if it will
leave you alone; try to act friendly and
don't strike at it.
R-18: Charge into the arena and strike
your opponent as quickly and as violently
as possible.
ROOM 18
You are moving cautiously through a
smoothly finished corridor sloping slightly
upward. Every few yards there is a lit
torch in a holder on the wall.
On your left
you see a door in the distance, and you
hear a low groan coming from somewhere
ahead. You approach the door
slowly and see that it is barred on the
outside and has a small window. You see
inside the decaying remains of a dwarf.
Another groan resounds through the
air, from further down the hall. There are
two more doors in sight from this point.
The cell on the other side of the first door
is empty, but the second contains an elf
chained to the wall. He is wounded and
appears to have been burned. Lifting the
bar, you approach the groaning elf. By
giving him a sip of your wine, you are
able to revive him slightly. After you ease
the strain of the chains holdidng him to
the wall, he tells you in mumbled phrases
through broken lips and cracked teeth:
"They jumped me near the red dragon.
I thought I would make it and show those
sneaky priests . . . I think that a hol d
person was used . . . I got some sort of
demon or familiar of his first . . . don't
know if he's an evil priest or just evil . . .
seemed to fear that I'd find something in
a room . . . behind a secret door . . . just
ahead.. . torture started then . . . hates
elves.. . the pain. . . feared the room . . .
oooohhhhh . . ."!
The elf then lapses into unconsciousness,
and is dead within a minute.
You go back out into the hall, and you
find a secret door a little farther down the
passage. Behind the door is an idol. In
the hands of the idol are two small
amulets. One contains the symbol for
protection from priestly magic, the other
for protection from any wizard's spell.
On the wall behind the idol are engraved
the words, "Choose one wisely." While
pondering which amulet to take, you notice
a dead creature near the door. The
creature is man-like, 18 inches tall, with
greenish reptilian skin, leathery wings,
and a bat-like mouth with fangs for teeth.
As you examine the obdy, you are startled
by a voice saying, "Leave Igor alone!"
Looking up quickly, you see a man in
black robes gesturing at you. He is too
far away to reach before the spell goes off.
Preparations (choose one)
S-1: Grab the amulet that will protect
you from clerical spells.
S-2: Grab the amulet that will protect
you from wizard's spells.
S-3: Take out the Slow
scroll (needed
for S-12).
S-4: Draw your sword in a threatening
manner.
S-5: Dive for a corner and try to evade
the attack.
S-6: Look surprised; act friendly.
S-7: Draw your dagger and throw it.
S-8: Grab "Igor" and try to use the
body as as shield.
Actions (choose one)
S-11: Rush up and attack with your
sword.
S-12: Cast the Slow
spell on your opponent
and then attack.
S-13: Rush forward and grapple.
S-14: Hide in a corner.
S-15: Rush through the door, swing as
you go by, and flee onward up the
corridor.
ROOM 19
You find yourself in an upward-sloping
corridor. The walls are finished stone
and well fitted together. Occasionally a
torch casts some light on the area.
Carefully moving forward, you wonder
if the tunnel will ever end or even if there
is a final door. Maybe this is how the
clerics of Felker execute people.
Then you come upon a doorway blocking
the tunnel that appears guarded by
two skeletons; but they don't
react until
you are within 10 feet of them.
After all of the problems and enemies
you've faced, two skeletons aren't even a
challenge, and you smash each of them
easily with the flat of your sword. After
opening the door, you are amazed at
what they were guarding.
Peeking inside you see an open door
across the room, with a stairway leading
up. Also, either your eyes are deceiving
you or a tiny wedge of sunlight is visible
at the top of what you can see!
The room itself is 30' x 20' with grey
rock walls. The body of some sort of noble
is sitting (apparently propped up) in
the center of the room on a silver table.
Guarding the body are three more skeletons
who hav enot yet reacted to your presence.
The body is wearing golden armor. Lying
next to it are a vorpal
blade and a
mace of disruption. Around the neck of
the body (which is quite decayed) is a
necklace of missiles
with three "jewels"
left. The body's right arm has rotted off,
but the hand resting on the floor wears a
ring with runes on it. At the feet of the
body rest a girdle and a helm, both inscribed
with runes. The shattered remains
of other skeletons are piled in a
corner. The three guardian skeletons
turn to watch as you enter the chamber.
Preparations (choose one or two)
T-1: Get out holy water (needed for
T-11).
T-2: Get out your sword.
T-3: Get out the Slow scroll and cast
the spell on the skeletons.
T-4: Cast any remaining spell (one
spell only) on yourself.
T-5: Get out your sprig of garlic.
T-6: Get out your dagger.
Actions (choose one or two)
T-11: Attack the skeletons
immediately
after throwing holy water on one.
T-12: Attack the skeletons
immediately,
hitting with your shield also.
T-13: Stay near the edge of the room
and attempt to sneak past the skeletons
(if chosen, this must be your only choice).
T-14: Take the girdle and helm.
T-15: Strip everything of value off the
body.
T-16: Take just the vorpal blade.
T-17: Take just the ring from the detached
hand.
T-18: Walk directly past the skeletons,
swinging as you go by (cannot also
choose T-11, T-12, or T-16).
ROOM 20
You climb a gently sloping stairway
upward toward a large pair of open
bronze doors. The sunlight becomes
brighter the higher you climb, and your
eyes hurt as they adjust ot the unaccustomed
brightness. It is either sunset or
sunrise; you've lost track of time during
the ordeal.
Beyond the doors, you see a peaceful-looking
valley with sheep grazing (but
no shepherd visible) and large, dark
birds wheeling in the distance. Nothing
seems to be menacing to you.
Careful of traps, you approach the
doors. Nothing occurs, and you swing
one slightly away from a wall. Visible
on the door is half of a hexagon, with
opal-sized holes located at each of the
corners. You begin to move the door
more, when out of nowhere you hear a
voice say, "It is forbidden to touch the
doorway."

Looking around in the small (10' x 10')
entranceway, you see nothing. After the
additional sound of a distant mumbling
from outside the doorway, a tense silence
resumes. Your nerves are tight and
the shadows seem to move of themselves.
Sudenly you notice a large minotaur
rushing up the stairway toward
you. He appears to be in a frenzy and
carries a very large battleaxe, but is approaching
noiselessly. The opals rattle
in your pocket as you turn to face this
new menace; from behind you somewhere,
outside the doors, you hear laughter.
Preparations (choose one or two)
U-1: Get out slow scroll and cast it at
the minotaur.
U-2: Throw gold at the minotaur's feet.
U-3: Get out the opals; this means setting
down your shield (needed for U-11,
U-12, U-13, or U-14).
U-4: Cast any remaining spell.
U-5: Rush out the doorway.
U-6: Throw food at the minotaur's feet.
Actions (choose one)
U-11: Fight the minotaur,
then attempt
to close the doors.
U-12: Rush out and search for the
source of the laughter, fight whatever
you find, then attempt to close the doors.
U-13: Ignore everything and try to
close the doors.
U-14: Forget it all and rush out into the
valley and away.
U-15: Hold up your holy symbol and
order the evil spirits to begone, then try
to close the door.
Room 1
A-1: Has no effect on anything that occurs.
A-2: Halves damage taken from black
pudding if
A-12 or A-15 is also chosen.
A-3: Destroys all of room's contents; player crosses
to next room with no damage.
A-4: Swords don't work against black
puddings.
Increase damage taken to 4 points if A-12 or A-15 is
also chosen.
A-5: Has no effect on anything that occurs.
A-11: Reach exit with no gain or loss.
A-12: Attacked by black
pudding under chest.
Take 3 points damage before it is killed (see notes
under A-2 and A-4).
A-13: Find nothing of interest; go to next room.
A-14: This scroll is explosive
runes. Take 4 points
damage; you're after opals, not scrolls.
A-15: This triggers an attack by the black
pudding
under the chest. Fire is the best way to fight them,
and the torch is magical. You easily defeat the pudding,
taking only one point of damage. All of the
torches go out when the one you chose dies.
Room 2
B-1: Continue on with no loss or gain.
B-2: Halve any damage
taken.
B-3: Successfully evade pursuit, gain nothing,
take 1 point damage from a sling
bullet as you flee.
B-4: Take only 1 point maximum damage from any
fight in this room.
B-5: No effect.
B-6: No effect.
B-11: No paladin
would be with this crowd or condone
torture. The paladin is hanging dead on the
wall. Take 7 points of damage in the fight that follows
with the four thieves. Find one opal in the chest.
B-12: Kill the first thief
(one wearing the stolen
paladin's gear) with a single blow, then kill the rest in
an easy fight because you had surprise. Take 2
points damage and find an opal in the chest.
B-13: Kill everyone in room, take no damage, but
destroy the opal in the chest. (Nobody ducked).
B-14: Gain partial surprise, take 3 points damage,
find opal in chest.
B-15: You receive an obscene reply and are attacked
by four thieves all at once. Thanks
to you
warning them of your presence, it is a hard fight, and
you take 5 points damage. Find an opal in the open
chest.
B-16: Has no effect on the first thief
to exit, but
gives those behind some warning. You take 3 points
damage in the fight that follows, then find an opal in
the chest.
Room 3
C-1: Adds 2 points to any damage received in fight
with sea lion.
C-2: No effect.
C-3: You can't jump 15 in armor. When you hit
the water, a sea lion attacks while
you are submerged
and partially blinded by the water. You drive
it off with your sword after taking 3 points damage.
C-4: Cut in half (round down) all damage
taken in
combat in this room.
C-5: Needed for C-12; otherwise
no effect.
C-6: Needed for C-16; otherwise
no effect.
C-11: You are attacked by a sea
lion as you swim
across. Take 3 points damage from its claws (plus
the extra damage indicated under C-1).
C-12: You are attacked by a sea
lion as you pull
yourself across. Your armor protects you somewhat;
take 2 points damage before driving it away.
C-13: You take no damage, and you notice as ou
pass over the stream that a large sea
lion dwells at
the bottom.
C-14: The sea lion
dwelling in the stream notices
the ripples from your crossing and smells your scent
in the water. This negates most of the advantage of
invisibility. Take 3 points damage in the crossing.
C-15: When you turn to climb
down, after finding
nothing at the top, you notice that you are looking
down into the den of a sea lion. (This is how the
keepers checked on their pet.) Being forewarned,
you prepare for trouble before you cross the stream;
halve all damage (rounding down) from the method
of crossing you chose.
C-16: When you throw the rations in, a sea
lion
rises to inspect them. It sees you on the bank and
attacks, but because you are still on land you only
take 1 point of damage, and are able to cross the
stream without further incident.
C-17: You find no passages. The sea
lion became
aware of your presence while you searched, and is
ready for you when you try to cross. Take 4 points
damage, plus the penalty for choosing C-1 above.
Room 4
D-1: No effect.
D-2: No effect.

D-3: This destroys the opal and the other treasure
being guarded by a red dragon.
The fireball weakened
the dragon, but it is still a formidable foe. Take
5 points damage and proceed to the next room.
D-4: The red dragon
in the chamber is trapped,
and so is the opal it was guarding. Go to next room,
ignoring any other results called for.
D-5: Needed for D-13; otherwise
no effect.
D-6: No effect; red
dragons can see invisible
objects.
D-7: No effect, except that the spell is lost.
D-11: A wounded red
dragon spies you trying to
sneak past and lets loose with its breath weapon.
Take 6 points damage and go to the next room.
D-12: A wounded and very upset red
dragon
awaits you. It uses its last gasp of breath weapon
against you before you reach striking range. You
take 8 points damage before killing the dragon, and
then find an opal hidden in the back of the cave.
D-13: You are splashing holy
water on a red dragon
who is not amused. It breathes on you, and in the
melee that follows you take further damage before
killing it. Mark off 10 points damage, and find an opal
hidden in the back of the cave.
D-14: Red dragon
aren't really attracted to food
-- especially dry, tasteless iron rations. The dragon
is warned of your presence, lets loose with its breath
weapon, and engages you in hard combat. Tkae 10
points damage and find an opal hidden in the back of
the cave.
D-15: The wounded red
dragon inside is not very
friendly. It will use its last breath attack on you and
then combat you with its claws. You kill it, but not
before taking 10 points damage. You find an opal
hidden inside the dragon's cave.
Room 5
E-1: Swords aren't the best weapons against skeletons,
and symbols only work for clerics. Increase
any damage taken in this room by 1 point.
E-2: Needed for E-11; otherwise
no effect.
E-3: Needed for E-14; otherwise,
this preparation
reduces damage taken by 1 point.
E-4: Destroys the skeletons,
and also fries the opal
which was in the chest.
E-5: No effect on skeletons,
which aren't conjured
or enchanted monsters. They aren't even evil!
E-6: No effect; a torch
won't do any special damage,
and the light it gives off is too dim to make any
difference.
E-11: Destroys the nearest skeleton;
the others
swing at you as you pass, doing 3 points damage.
Find opal in chest.
E-12: Axes are edged weapons, which do half
damage to skeletons. Take 5 points
damage, find
opal in chest.
E-13: Flails are good weapons against skeletons;
take 2 points damage, find opal in chest.
E-14: The table is really the ideal blunt weapon
for
use against skeletons. Not only
does it smash them
easily, it does so at a distance so they can't strike
you. Take no damage, find opal in chest.
E-15: A good defensive position, but your sword
only does half damage to skeletons.
Take 3 points
damage before the last skeleton is smashed, and
then find an opal in the chest.
Room 6
F-1: Destroys the trolls
with no damage to you. Go
to next room.
F-2: Deduct 2 points from any damage
received in
this room.
F-3: Deduct 1 point from any damage
received
(but also see F-12 if chosen).
F-4: Good defense against trolls,
but it has no
effect on combat.
F-5: No effect.
F-6: Since you can't see the trolls
from where
you're standing, you aren't likely to hurt them with
your patch of fire. They will be wanred of your presence;
add 2 points to any damage taken.
F-11: There are two trolls
in the room. You take 5
points damage before killing them.
F-12: The trolls
will see you as you get part way
across the area unless you also used invisibility. If
F-3 was chosen, you get past without damage; if not,
take 5 points damage in the fight that follows.
F-13: A search will turn up nothing. Sorry, no opal,
just dead trolls.
F-14: If preparation F-1 (Fireball)
was not taken
and this action was not taken, add 1 point damage
when a barely regenerated troll takes a swipe at you
just before you get away.
F-15: Friendly trolls?
You gotta be kidding. Take 6
points damage in the fight that follows.
Room 7
H-1: Destroys the fire
beetles inside the wall, and
also the opal which was sitting on a table in the back
of the chamber. Take no damage, go to next room.
H-2: You see that you are facing fire
beetles, and
you deduct 1 point of damage from the combat that
ensues because they don't like the light.
H-3: Needed for H-11, otherwise
no effect.
H-4: No effect.
H-5: Needed for H-12; otherwise
no effect.
H-6: The spell works on doors, not on doorless
openings. No effect.
H-11: Now you're facing a wet fire
beetle who is
very hungry. Take 3 points damage in the melee that
follows, find an opal on a table inside the darkened
area.
H-12: The fire
beetles are easily distracted by the
food. They rush for it, and you rush for the table in
the back of the chamber, where you find an opal.
Take no damage, go to the next room.
H-13: You're fighting fire
beetles in their element.
Take 4 points of damage, or only 2 points if H-2
was also chosen. Find an opal in the back of the room.
H-14: Fire
beetles are dumb, but fast. One of them
actually catches up to you. Take 2 points of damage as
it bites from behind before you kill it.
H-15: So now you're a cleric? Anyway, fire
beetles
aren't smart enough to know what a holy symbol is.
Take 3 points damage in melee, then find an opal on
a table in their lair.
Room 9
J-1: No effect on mummies,
which are neither conjured
nor enchanted.
J-2: Needed for J-11; otherwise
no effect.
J-3: That takes care of all the mummies
and the
opal, too. Take no damage, go to next room.
J-4: No effect.
J-5: Needed for J-14; otherwise no effect.
J-6: Adds to your agility, as you stay near the walls
and fight it out. Deduct 2 points from any damage
taken.
J-7: Needed for J-13; otherwise no effect.
J-11: You are able to grab the opal form the mummy
you doused with the holy water, and you flee the
rest, taking 4 points of damage.
J-12: Mummies are
far from fast on their feet. You
don't get the opal, but you only take 1 point damage
as you waltz across the room.
J-13: The one you oiled goes up in smoke. In
melee with the others, you manage to kill two of
them and grab the opal before fleeing. Take 4 points
damage in the fight.
J-14: Sorry, mummies
only listen to this trick when
it's performed by a cleric. They get in first licks while
you get out your sword. You take 6 points damage
and manage to grab the opal from the one wearing it.
J-15: The higher "plus" of the dagger is offset by
the shortness of its blade, which allows the mummies
a better chance at hitting you. Take 5 points of
damage and grab the opal.
Room 10
K-1: A silly thing to do, unless you enjoy wasting
spells. No effect.
K-2: Ditto.
K-3: Needed for K-11; otherwise
no effect.
K-4: Needed for K-13; otherwise
no effect.
K-5: You were supposed to get opals, no lock
them away. Oh, well . . . go to next room.
K-11: By mixing water
with a strong acid, you have
found the only possible way to get injured in this
room. You take 1 point damage from the small
explosion that follows, and the opal is destroyed.
K-12: Nice try, but it doesn't work. You lose the
opal into the acid but suffer no harm.
K-13: Congratulations! Sometimes it doesn't pay
to be overly cautious. You grab the opal with no
problem.
K-14: The opal dissolves, along with a little bit
of
your optimism.
K-15: Nothing else happens. The panel slides back
across the opening and cannot be reopened.
Room 11
L-1: Good move, but not the best. No effect on
damage taken.
L-2: You feel as though you don't need food or
water, but the gas will still affect you. No effect on
mummies taken.
L-3: Suddenly the air seems as pure and fresh as a
pine forest. You take no mummies;
go to next room.
L-4: You are now immune to spells of up to 4th
level. However, that is meaningless here; you are still
affected by the gas.
L-5: Your lungs burn, and you now know enough
never to drink holy water again. No
effect on damage
taken.
L-11: Take 2 points damage
before you run clear
of the cloud after 70 feet.
L-12: Take 5 points damage
before the gas disperses.
Why did you do that?
L-13: You find nothing (you already looked once),
but you take 3 points damage before
you are forced
to flee up the corridor.
Room 12
M-1: Iron golems
are only hit by weapons of +3 or
better, even if they're little ones -- you should have
taken up your dagger. You take 2 extra points of
damage when you realize you must change weapons
and have to take the time to do it.
M-2: Good move; you need the +3 weapon to hit
the golem. Deduct 1 point damage
from combat.
M-3: Needed for M-12; otherwise
no effect.
M-4: No effect.
M-5: This definitely helps you to evade the golem.
Deduct 2 points damage from combat.
M-6: Needed for M-15; otherwise
no effect.
M-7: Anyone who doesn't choose this preparation
will take 1 point damage from the
golem's attack of
poisonous gas.
M-11: The golem is hurt but not helpless. Take 3
points damage before killing it (see M-1).
M-12: Did you expect to rust it to death? Take 4
points damage in the battle that
follows.
M-13: Golems move
slowly: there is only one exchange
of blows, causing you 2 points damage, before you
get past.
M-14: Golems aren't
fast, but they're patient. Eventually
you get cornered and have to make a run for it.
The monster hits you for 3 points damage before you
get away.
M-15: Almost the dumbest thing you could have
done. Fire helps to repair damage to iron
golems.
You take 3 points damage while escaping from the
now-strengthened golem.
M-16: Definitely the dumbest thing you could have
done. The fireball has repaired
all the golem's damage;
it now looks and fights like new. You take 8
points damage before getting away.
Room 13
N-1: This definitely helps in a fight, but not if
you're not planning to battle the monster. Deduct 3
points from damage taken, unless action N-13 or
N-14 is also chosen.
N-2: Needed for N-11; otherwise
no effect.
N-3: The dagger is less useful than the sword
against an invisible opponent, and a +3 weapon is
not needed to hit an invisible
stalker. Add 1 point to
damage taken.
N-4: Excellent choice. The spell keeps the invisible
stalker
from doing you any harm. Take no damage
regardles of whatever action you chose, and go
to next room.
N-5: Now you and the invisible
stalker are on even
terms. Deduct 2 points from damage taken.
N-6: No effect.
N-7: Needed for N-15; otherwise
no effect.
N-11: Now you're facing a wet invisible
stalker.
The water allows you to see its shape for one round,
and so you win the fight with only 2 points damage.
N-12: The invisible
stalker puts up a good fight,
but you win after taking 3 points damage.
N-13: Invisible
stalkers are notoriously anti-social
when they're on the job. Take 4 points damage in the
fight that follows, because the stalker gets in the first
blow.
N-14: Where are you going to hide -- from something
you can't even see -- in a five-foot-wide corridor?
Take 6 points damage in the battle you are
forced to fight with the invisible
stalker.
N-15: Invisible
stalker are rarely distracted by
food. Take 4 points damage as you fight your way
away from the creature after slipping past it.
Room 14
O-1: The light awakens a bronze
dragon who was
asleep atop its treasure pile. Add 3 points damage if
O-11, O-13 or O-14 was chosen; otherwise no effect.
O-2: Needed for O-11 or O-14; otherwise
no effect
(the dragon does not wake up).
O-3: You kill the bronze
dragon without taking
damage, but you also destroy the opal. Go to next
room.
O-4: The dragon wakes up and eyes you curiously.
Add 3 points to damage taken if O-11, O-13 or O-14
is chosen; otherwise no effect.
O-5: You succeed in getting away without harm,
but also without the opal.
O-6: Needed for O-13; otherwise
no effect.
O-11: The creature is a bronze
dragon who is lawful
good and wouldn't have hurt you, but now it's
mad. Take 5 points damage in the fight you started,
and get the opal from the dead dragon.
O-12: The dragon will ask you, in lawful
good, why
you need the opal, and after you explain your plight,
it will gladly give you the jewel. Take no damage, go
to next room.
O-13: You succeed in tying its mouth shut, but the
dragon awakens when the first blow is struck. Before
the dragon dies, it gives you 4 points damage.
You
lose your rope and gain an opal.
O-14: It's impossible to steal something from the
dragon's treasure hoard and steal away. It attacks
you from behind as you sneak off, causing 6
points damage before you get away
with the opal.
O-15: The dragon is lawful
good and is glad to
help. It gives you the opal and wishes you luck.
Room 15
P-1: The scroll contains a curse that causes you to
"accidentally" stab yourself for 1 point damage
as
you leave the area.
P-2: This scroll is a map that the stranger was
making. Since you can really only go one direction
anyway, the map is of no use to you and has no effect
upon you.
P-3: No effect; he remains unconscious.
P-4: Needed for P-11 and P-12;
otherwise no
effect.
P-5: Okay, now he's dead. No damage and no
effect, but your alignment wobbles slightly.
P-6: No gain or loss; go to next room.
P-11: The vial contains a special healing
potion.
You gain back 1 point of damage.
P-12: The stranger suddenly looks much better,
and he is grateful. He mutters in a strange language,
touches you, and heals 2 points of your damage.
When you show him the opals you are carrying, he
reaches into his pocket and gives you another one,
then bows his head in prayer and
walks back toward
the entrance.
P-13: No gain or loss, no damage taken.
P-14: No gain or loss, except for a slight shift
in
your alignment.
P-15: Your search reveals an opal in the stranger's
pocket. You take it and proceed onward.
Room 16
Q-1: Needed for Q-11; otherwise
no effect.
Q-2: Needed for Q-12; otherwise
no effect.
Q-3: Needed for Q-13; otherwise
no effect.
Q-4: Effectively the same as Q-13;
take 3 points
damage as you shove your way through the fungi.
Q-5: No effect.
Q-6: No effect.
Q-11: You cross with no damage, and you are able
to grab the scroll before you leave the area. It has a
Slow spell written on it. (Note: The
scroll is also
obtained following any of the other actions.)
Q-12: A good maneuver; you get through without
damage.
Q-13: The violet
fungi strike out at you, and your
flesh begins to rot where they hit you. Take 3 points
damage before getting through. Garlic has
no effect,
but is ruined.
Q-14: Effectively the same as Q-13;
take 3 points
damage as you shove your way through the fungi.
Q-15: Going through faster would have been better.
The fungus causes 4 points damage
before you
get clear of the area.
Room 17
R-1: Needed for R-14; otherwise
no effect (the
spell will work).
R-2: If R-13 is chosen, this deducts 1 point from
damage taken from the demon
in the right-hand
area.
R-3: Prevents damage from demon
(Type II) if
R-13 is chosen; otherwise no effect.
R-4: Needed for R-15.
R-5: Reduces damage done by demon
by 3 points
if R-13 is chosen; otherwise no effect.
R-6: Needed for R-16 (the torch
will stay lit).
R-7: No effect.
(Note: Anyone who survives an encounter in any
one of the areas will find an opal in the box on the far
side of the arena.)
R-11: When you cross, the floating creature drifts
around aimlessly, ignoring you. Take no damage
unless you also chose R-16 or R-18, in which case
you take the listed amoung of damage.
R-12: The gorgon
will attack at the first opportunity.
Take 6 points damage.
R-13: The Type
II demon in this area will hand you
10 points of damage (see R-2, R-3, R-5).
R-14: This spell will cause you to take no damage
from the gas spore in the left-hand
area, and will cut
the damage done by the gorgon in half, to 3 points
instead of 6. The demon is not affected by the spell.
R-15: This hurts only the demon in the right-hand
area: deduct 2 points from damage caused by it. Add
1 point of damage if used against the gorgon, because
you had to get very close to douse the creature.
No effect on the gas spore.
R-16: Add 2 points to damage taken if fighting the
gorgon or the demon, both of whom
would have
been better avoided. The torch almost bursts the gas
spore, but you back off just in time and take no
damage if you chose the left-hand area.
R-17: Nobody accepts your offer. Take damage
as
usual.
R-18: Deduct 1 point from damage taken if R-12 or
R-13 was also chosen. Take 5 points damage when
the gas spore bursts if R-11 was
chosen.
Room 16
S-1: Not much good against the spell this wizard is
casting against you for disturbing the body of his
homonculous. Take 3 points
from magic
missiles immediately.
S-2: Nothing seems to happen, except that the
wizard trying to attack you gets
very upset.
S-3: Needed for S-12; take 3 points damage from
the wizard's magic missiles.
S-4: After you take 3 points damage from the first
magic missile attack, the
wizard looks mad enough
to start another spell.
S-5: Nice try, but the wizard's magic
missiles don't
miss. Take 3 points damage.
S-6: The wizard's
magic missiles still hit you for 3
points damage, but you take 3 points less damage
from any result that follows.
S-7: The wizard
can easily aim a magic missile
around the small body. Take 3 points damage immediately,
and add 1 extra point of damage taken if
any action but S-13 or S-14 is chosen.
S-11: The wizard
isn't much of a fighter. He hits
you for a 1-point scratch and then falls. You find an
opal in his pocket.
S-12: The wizard
moves so slowly that you slit his
throat before he can react. Take no damage and fin d
an opal in his pocket.
S-13: You take 1 point damage
as the wizard bites
you. You finally strangle him, then find an opal in his
pocket.
S-14: You take a second hit from magic
missiles
for 4 more points damage, then the wizard laughs at
you and leaves.
S-15: Take 2 points damage
as you rush past and
knock the wizard over. Before he can get another
spell ready, you are out of sight.
Room 19
T-1: Needed for T-11.
T-2: No effect.
T-3: Deduct 1 point from damage
taken.
T-4: No effect, unless it obviously is one which
would destroy or isolate the skeletons.
T-5: No effect.
T-6: No effect.
T-11: Take 1 point damage
in melee.
T-12: Take 2 points damage
in melee.
T-13: Take no damage;
go to next room.
T-14: The armor is cursed. Take 2 points damage
and if you did not also fight the skeletons,
take 1
point more. An opal is in the helm. Was it worth it?
T-15: Take 3 points damage from the cursed objects
in and around the body, and 1 point more if you
did not also fight the skeletons.
There is an opal in
the helm.
T-16: The sword is cursed. Take 1 point damage
and 1 more if you did not also fight the skeletons.
T-17: The hand doesn't react, but the ring is a ring
of weakness. You collapse
and take 1 point damage;
add 3 more ifyou didn't also fight the skeletons.
T-18: Take 1 point damage
in the exchange with
the skeletons. They are only guarding the body and
do not pursue you.
Room 20
U-1: No effect on the minotaur,
which is an
illusion.
U-2: No effect; ignored by the illusionary minotaur.
U-3: Needed for any action choice but U-14.
U-4: Any spell cast at the illusionary minotaur
has
no effect. Any spell cast on yourself will not help in a
fight. Wall of Stone will protect you long enough to
close the doors without taking further damage, if
U-13 is chosen.
U-5: You don't see anything outside, and now you
have to fight your way back into the caverns. If U-11,
U-12 or U-15 was also chosen, add 2 points to any
damage taken.
U-6: Ignored by the illusionary minotaur.
U-11: Take 4 points damage from the illusionary
minotaur and then 1 point more
from the dagger of
the illusionist, who attacks you from behind. The
illusionist then flees, and if you're alive, you can
close the doors.
U-12: You see nothing, then suddenly take 3
points damage from an illusionist's
dagger in your
back. The illusionist becomes visible, the minotaur
disappears, and you can kill the spell-caster before closing
the doors.
U-13: When you get the doors shut, the illusion of
the minotaur vanishes, and you
hear the cursing of
an illusionist from outside the doors as you lock the
opals into place. Congratulations!
U-14: Take 2 points damage from the invisible
illusionist as you rush past
him, then flee into the
wilds to end your days as a hermit.
U-15: No one goes away, but the laughter gets
louder. The illusionist disappears
(you broke the illusionist's
concentration), but the spell-caster hits you
from behind with a dagger for 3 points damage before
he flees. If you're alive, you can close the doors.
Guidelines for judges
Although the "programmed" nature of Cavern Quest takes
much of the decision-making out of judging, it is still necessary
for the adventure to be closely monitored by a referee. Each
player is being taken thruogh the adventure at the same time,
the results of their actions and preparations should be told to
each one separately, to prevent the other player(s) from learning
too much.
To begin, each player should be provided with a facsimile of
the character sheet that accompanies the text. (Permission is
granted to photocopy any and all parts of this adventure for the
purpose of disseminating it among players.) Players should
indicate their choices for preparations and actions by circling
the appropriate letter-number code on the sheet. The judge
should cross off, or make sure the players cross off, all equipment
and spells, which are not reusable. In like fashion, a character's
points of damage and opals obtained should be marked
off, either by the judge or by the players under the supervision of
the judge, as they accrue.
At the discretion of the judge, players may be allowed to have
access to the AD&D Players Handbook.
However, Cavern
Quest is designed in such a way that a very basic knowledge
of
the rules, plus a large dose of common sense, will be enough to
enable a character to make it all the way through.
OUT ON A LIMB
Cavern Quest critic
Dear Editor:
Issue #54 had some very good stuff in it,
except...this Cavern Quest thing. Now, dont
get me wrong. I like solo adventures. They
give a player a chance to see if he/she is a
good gamer alone.
Apparently, Cavern Quest was greeted with
such enthusiasm that it was not proofread
very carefully. Some of the results at the end
really irritated me. I mean, I took six (yes, 6)
hit points in the first room. The description
assumed that if I looked at a Black Pudding, I
wouldnt know what it was. Come on, now.
My second major disagreement with the
game occurred in Room 8, action H-15, Get
out your holy symbol and order the eyes
away. The result for this action begins, So
now youre a cleric?... Fortunately, I did not
do this, but two things occurred to me when l
read it. One, it would probably be dangerous
for a DM to tell an adventurer that, and two, if
this half-elf wasnt a cleric, this should never
have occurred to him. He would have known
that he couldnt turn whatever was coming at
him. Why was the option included?
My third and final gripe is minor in one
sense and serious in another. In Room 12, an
iron golem attacks the half-elf. Action M-15
reads, Throw oil and light it with a torch.
The result for this action reads, Almost the
dumbest thing you could have done. Fire
helps to repair damage to iron golems. You
take 3 points of damage while escaping from
the now-strengthened golem. The Monster
Manual specifically states that magic fire
will repair damage to an iron golem. This
looks like an error in which the author hastily
scanned the MM entry and proceeded to merrily
thrown in a monster. Even if Mr. Fawcett
merely made a mistake, somebody on the editorial
staff should have caught it.
DerriI Willard, Jr.
Batesville, Ark.
(Dragon #57)
Okay, Derril, lets take your complaints one
at a time. First: Theres no way you could take
6 points of damage in the first room unless
you didnt follow instructions. You can only choose
one action in that room, and the most damage
any single action will cause is 4 points. Play it
again, Derril...
Second: The stuff about the holy symbol
and So now youre a cleric? is pretty harmless,
and is included primarily for a bit of
humor. I can easily imagine a desperate player
being tempted to haul out his holy symbol
once it is mentioned as an option (the
power of suggestion is very powerful sometimes).
And your complaint contradicts itself:
If you think its dangerous for a DM to point
out to a player that his character is not a cleric,
how can you also assume that the player
Would have known that he couldnt turn whatever
was coming at him?
Third: This is the most valid complaint of
the three. I can offer you 2 explanations,
and you can take your choice: 1) The torch
(given to Orlowson by the priests) is magical,
just like the torches in Room 1 were. Or, 2) we
goofed. Confidentially, I'd go with number 2.
But don't tell the golem.
-- KM
(Dragon #57)