FOR ADVANCED D&D GAME
Dungeon Module A0
DANGER AT DARKSHELF QUARRY
FOR ADVANCED D&D GAME
Dungeon Module A0
DANGER AT DARKSHELF QUARRY
Darkshelf Quarry holds more than limestone
and granite. Whispered rumors abound that the quarry's dwarf isn't what
he pretends
to be, and that he's involved in unscrupulous
dealings with foreign threats. Investigation is the only way to learn the
truth, but
beware! The quarry is well defended,
and danger lurks within its dark tunnels and hidden chambers.
This module contains a challenging scenario,
along with maps, notes, and background information for the Dungeon Master.
Danger
at Darkshelf Quarry is a complete adventure
in itself, but it can also be used as a prequel to the Slave Lords series:
A1 (Slave Pits of the Undercity), A2 (Secret of the Slavers Stockade),
A3 (Assault on the Aerie of the Slave Lords), and A4 (In the Dungeons of
the Slave Lords).
Dungeon Module A0
Danger at Darkshelf Quarry
By Skip Williams
AN ADVENTURE FOR CHARACTER LEVELS 13
Darkshelf Quarry holds more than limestone
and granite. Whispered rumors abound that the quarry?s dwarf overseer isn?t
what he
pretends to be, and that he?s involved
in unscrupulous dealings with foreign threats. Investigation is the only
way to learn the truth, but
beware! The quarry is well defended,
and danger lurks within its dark tunnels and hidden chambers.
This module contains a challenging scenario,
along with maps, notes, and background information for the Dungeon Master.
Danger at
Darkshelf Quarry is a complete adventure
in itself, but it can also be used as a prequel to the Slave Lords series:
A1 (Slave Pits of the
Undercity), A2 (Secret of the Slavers
Stockade), A3 (Assault on the Aerie of the Slave Lords), and A4 (In the
Dungeons of the Slave Lords).
Today, the quarry is producing more stone
than ever. A small,
dedicated workforce toils in three shifts
around the clock. A steady
flow of oxcarts hauls rough blocks of varying
size from the quarry
to the docks at Darkshelf.
From there, the stone goes to building
sites up and down the coast or into the
continental interior via river
barges.
Most of the locals attribute the increased
production to the efforts
of Bazili Erak, a flame-haired
dwarf
with a beard to match. Ba-
zili has received the title to the quarry
and environs from the local
overlord in return for a share of the revenues.
Until recently, the
overlord has had no cause to complain:
revenues from the quarry
have quintupled. Bazili has not only increased
production but also
discovered several veins of pure quartz
and even a little gold deep
in the quarry (or so he claims).
However, all is not entirely well at the
quarry. As the workers
tunneled more deeply, they broke into underground
springs that
flooded parts of the quarry and drowned
several members of
the crew. Other workers have reported eerie
soundsincluding
moans,
cries, rattling chains, sobs, and rhythmic chantingcom-
ing from some of the disused tunnels.
Human
workers drawn mostly from Darkshelf and the
surround-
ing country fill two shifts at the quarry.
The 3rd shiftworking
at nightis rumored to consist of dwarves
from Bazilis clan (see
Bazili Erak, below, for the true story).
The human workers never
mix with the dwarves or even see them except
as shadowy figures
deep in the tunnels. Only Bazili deals
with these dwarves.
The quarry isnt the only place where mysterious
trouble has aris-
en. On the waterfront
at the village of Darkshelf and on the Pelyra
<zoom-in map!>
River nearby, several half-eaten bodies,
both human
&& animal,
have turned up. Carnivorous fish are suspected,
even though some
of the victims were found well inland.
In truth, several mudtigers
from caverns
below the quarry have found their way out and have
begun hunting in the Darkshelf
area. (See the mudtiger
entry at the
end of the module for details on this monster.)
Perhaps most troubling, pirates
&& slavers have been active in the
region lately. Sailors, fishers, and farmers
have been abducted.
The local overlord seems to have succeeded
in turning the sla-
vers back for the time being. Bazili and
his unseen dwarves lent a
hand, tracking
a slaver gang to its hideout in a midnight raid and
freeing a score of captives. The dwarves
also killed several slavers
and captured a few of them alive. These
prisoners were dragged
back to Darkshelf,
where they were swiftly tried and executed.
Despite the recent success against the slavers,
a cloud of unease
hangs over Darkshelf
and the quarry. The citizens know that the sla-
vers might return at any time
and seek revenge for their setback. The
other incidents (the noises in the mines,
the mysterious dwarves, and
the half-eaten bodies) all seem to bode
ill for the AREA.
BAZILI ERAK
The energetic dwarf
known as Bazili Erak is really a half-orc
. fighter
named Brubgrok who resembles a dwarf closely
enough to fool
most people he meets. Brubgrok has genuine
skill at mining
and
stonework,
and he has quite a smooth tongue. He successfully nego-
tiated a deal with Darkshelfs
overlord for control of the quarry and
has been digging a record amount of stone
from it. However, his sto-
ry about finding gold
in the quarry is a fabrication; Brubgrok made
it up to help explain the income that he
is earning from slaving.
The half-orc is part of a growing network
of slavers who are tak-
ing captives and funneling them to the
despoiled city of Highport
in The
Pomarj. Brubgrok acts as a broker, buying slaves from bands
of slavers and hiding them in the depths
of the quarry until they can
be shipped to Highport. Slaves are transported
through a series of
caverns
that connect the quarrys lowest levels with the Pelyra River.
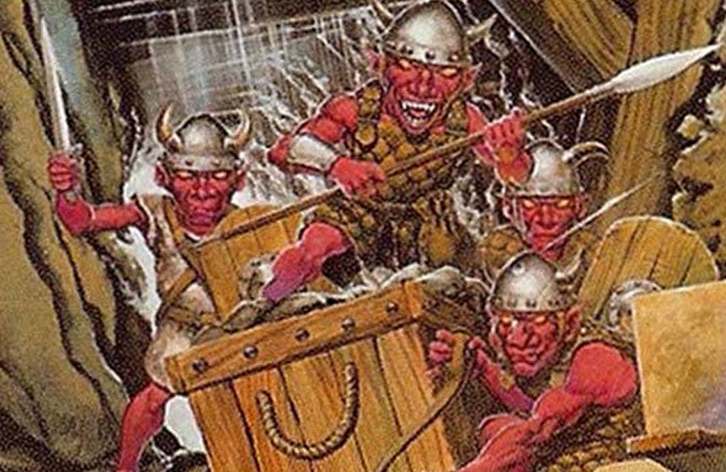
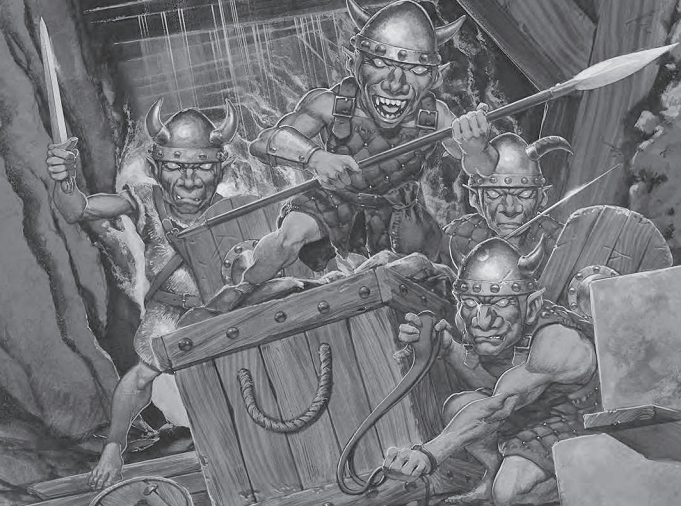
Brubgroks dwarves are actually goblins.
These skinny human-
oids cant pass as dwarves, so they try
to stay out of sight.
The midnight raid on the slavers encampment
was a staged affair.
Brubgrok and his slaver allies
rounded up a few members of their
organization whose loyalties seemed questionable
and told them
to collect slaves near Darkshelf.
Brubgrok and his goblins
then
met with the slavers under the pretense
of purchasing captives,
but instead they turned on the suspected
traitors. The slavers who
were deemed the most dangerous to the organization
were killed
outright, and the rest were brought to
trial. (The trial itself was le-
gitimate; only the arrest of the culprits
was fishy.) The authorities
in Darkshelf
were unaware of the ruse, and the betrayed slavers
never figured out what hit them.
THE MISSION
Darkshelfs
overlord, a man named Neistor, is wary of Bazili Erak.
While the PCs are in or near the village,
they learn
that Neistor wants to hire adventurers
to look into the dealings at
the quarry. If they do not seek out the
overlord on their own, even-
tually he sends for the party.
The characters meet with Neistor in his
private office in the town
hall. Read the boxed text aloud to the
players.
| The village overlord is a stocky, middle-aged
man with graying
hair and a beard to match. The results from the quarry seem too good to be true, he says. And the raid on the slavers camp was a little too quick and clean, if you ask me. He starts counting on his fingers as he
paces back and forth
He turns to face you. Somethings not right
at that quarry. Wil
|
If the characters ask whether anyone else
has investigated the
quarry, he hesitates before admitting that
he did send another
agent.
| It wasnt so much the quarry as it was
the attacks. I sent a man
named Kwon out to find whats been killing our people and leav ing the bodies looking half chewed-up. He brought me a few reports, but I havent seen or heard from him in a while now. Neistors face becomes grim. Frankly, Im
worried. Im hoping
|
If asked, Neistor shares the info that Kwon,
a human
. monk,
sent back before he disappeared. In his
last communication, he re-
ported finding a hidden dock on the river
below the quarry. Kwon
indicated that his next MOVE would be to
explore the quarry with-
out Bazili Eraks
knowledge.
The report includes the location of the
ventilation shaft that leads
down to area
37
in the quarrys main level. It also reveals the lo-
cation of a hidden dock on the local river
(see Darkshelf and Envi-
rons)
that leads to area
56
in the caverns
below the quarry.
Neistor is worried about his agent, but
he does not realize that the
monk is not in immediate need of rescue.
Kwon has infiltrated the
quarry, joined a group of slaves, and started
exploring the AREA in
secret (see area
53).
If the PCs ask for a reward for exploring
the quarry
and rescuing the monk,
Neistor makes them an offer.
| The overlord nods. Fair enough. Tell you
whatyou find out
whats really going on, put a stop to any trouble, and find Kwon, and Ill pay you 500 gold pieces from the village coffers. Neistor puts on a weak smile. Eraks also
reported that his
|
As noted previously, the quarry workers
found no gold, but the
PCs might interpret Neistors statement
to mean that
they are justified in keeping whatever
treasure
they do happen to
find in the quarry.
DANGER AT DARKSHELF
QUARRY has been designed for 6
to 8 characters of levels 1 to 3. A party
wishing to attempt this
adventure should include several fighters
and at least 1 priest,
1 wizard,
and 1 thief.
A 1st-level party should have 7
or 8 characters, including 1 or 2 elves.
Before running DANGER AT DARKSHELF
QUARRY, the DM
should read the adventure thoroughly so
as to become familiar
with all the info given about the scenario.
Info in
the encounter keys is generally divided
into 2 sections. The
boxed text should be read to the players
when their characters
enter an encounter AREA unless circumstances
prevent the party
from learning the info given. All other
text is meant for the
DM only so that he or she can referee the
encounter. Players might
discover some or all of this info during
the game, but they
will not know it at the START of the encounter.
The PCs can enter the quarry by any method
avail-
able to them. The ventilation shaft or
caverns
are the safest bets for
the heroes, but they can also bluff their
way in through the guard-
house (area 1)
or the main gallery (area 34).
An open approach places the characters at
considerable risk. The
denizens of the quarry are not stupid;
they are well aware that the
discovery of their true activities could
be disastrous. They do their
utmost to pose as honest merchants
while keeping visitors at arms
length. They require that armed visitors
surrender all weapons be-
fore entering the quarry. See the notes
in each area for guidelines
on how the guards there react to visitors.
MONSTER AND NPC STATISTICS
This adventure includes an abbreviated
format for monster and
NPC statistics:
AC = Armor Class
MV = Movement rate
HD = Hit Dice
hp = Hit points
#AT = Number of attacks
D = Damage
SA = Special attacks
SD = Special defenses
DARKSHELF
AND ENVIRONS
Some player groups might poke around the
neighborhood before
tackling the quarry. The coast around Darkshelf
rises quickly to a
series of bluffs that are mostly covered
in forest. Near the village,
the land lies fairly low, and the countryside
has been cleared for
farming. Farther inland, the bluffs and
the trees rise. Just west of
the village, the Pelyra River flows into
the Sea of Gearnat.
The action in this adventure centers on
the quarry, which is locat-
ed in the high bluffs about three miles
inland from the village. The
Pelyra River is less than half a mile west
of the quarry and connects
to its tunnels through an underground tributary.
The Bluffs and Forest
Although not exactly a wilderness, the
wooded uplands are wild and
lonely. The party wont find anything there
except for a few wood-
cutters and possibly a patrol that Brubgrok
has sent from the quarry.
Ventilation Shaft
The PCs might decide to enter the quarry
through the
ventilation shaft. To find it, they must
carefully search the hilltop
above the quarry.
The shaft is about 5 feet wide and has
stone-lined
sides. It is nearly
hidden in a thicket of saplings and looks
like an abandoned well.
Even with Kwons report, the characters
must search for at least an
hour, peering into the undergrowth and
probing the ground, to
locate the shaft.
Once they find the shaft, the characters
can easily push through
the undergrowth to access it. The shaft
leads down 40 feet to area
37 in the
quarry. Characters can tie a rope around one of the
many trees near the shaft and use it to
descend quickly. For the
purposes of climbing,
the shafts stone walls are somewhat rough
and slightly slippery (see page 19 of the
DUNGEON
MASTERS
GUIDE), which allows climbing characters
to travel 6 per round,
with double the normal chances for a fall.
Random Encounters
Each hour, there is a 1 in 6 chance that
the characters have a ran-
dom encounter. If they do, roll 1d6 and
consult the following table
to determine what they encounter.
1-2: Wild animal(s)
3: Ghoul(s)
4-6: Patrol
Wild Animal(s): The party encounters
a hunting carnivore or oth-
er aggressive animal. Roll 1d8 to determine
the exact creature(s):
1 Wild
Boar: AC 7; MV 15; HD 3+3; hp 14; #AT 1; D
312; SA can keep fghting for two to ?ve
rounds when
at 0 to 6 hit points, but dies when reduced
to 7 hit
points or fewer.

23 Black
Bear: AC 7; MV 12; HD 3+3; hp 15; #AT 3;
D 13/13/16; SA claw hit on a roll of
18 or better
results in a hug that deals an extra 28
points of dam-
age.
46 Wolves
(25): AC 7; MV 18; HD 2+2; hp 11 each;
#AT 1; D 25.
7 Panther: AC 6; MV 12; HD
3+2; hp 14; #AT 3; D
13/13/16; SA if both claws hit, can
make two extra
attacks with rear claws (D 14/14). <close
to mountain lion>
8 Huge
Spider: AC 6; MV 18; HD 2+2; hp 11; #AT 1;
D 16; SA poison bite (+1 bonus to the
saving throw),
surprise on a 15 on 1d6.
Ghouls
(12): AC 6; MV 9; HD 2; hp 9 each; #AT 3; D 13/1
3/16; SA paralysis; SD immune to sleep
and charm. These crea-
tures roam the countryside, scavenging
for food. They are not op-
posed to taking fresh meat.

Patrol: The
characters encounter a patrol of 25 human fight-
ers mounted on light warhorses or a pair
of goblins mounted on
worgs. Goblins are encountered only at
night or in forests where
they are shielded from the sun. The patrols
are aware of Bazilis se-
cret slave operation but will not divulge
what they know unless they
are charmed into doing so. They do not
know Bazilis true name
or that hes a half-orc. There is a 25%
chance that Brubgrok or
Glyrthiel accompanies a patrol; see areas
18
and area 19 for statistics
on these leaders. These two NPCs ride light
warhorses. If Brubgrok
or Glyrthiel is killed in a random encounter,
the party cannot en-
counter that character again in the guardhouse
or quarry.
HumanFighters
(25): AC 4 or 5; MV 9; HD 1; hp 4 each; #AT
1; D 28 (broadsword)
or 16 (shortbow).
Light
Warhorses (1 per rider): AC 7; MV 24; HD 2+2; hp 10
each; #AT 2; D 14/14.
Goblin
Worg-Riders (2): AC 6; MV 6; HD
11; hp 3 each;
#AT 1; D 16 (spear),
16 (shortsword), or 14 (sling);
SA split
move and fire when mounted (move up to
half, fire, and move up
to half again).

Worgs (2): AC 6; MV 18; HD 3+3; hp 15 each; #AT 1; D 28.
The Village
Adventurers who investigate the village
of Darkshelf before tack-
ling the quarry can learn the quarrys
history, as described in the
Adventure Background.
With a little effort, the party can interview
locals who work in the quarry; however,
these people know very
little. When their shifts begin, they report
for work at the main gal-
lery and proceed to one of the active digging
sites. Workers can
describe the general layout of the top
2 levels of the quarry, but
none has seen the inside of the guardhouse.
Many quarry workers have also heard the
troubling sounds men-
tioned in the Adventure Background, but
they cannot say for sure
what those sounds really are. The villagers
admit that the sounds
might arise from wind
and water in the tunnels, might be echoes
from work in other parts of the quarry,
or might just be imagined
by people who have the jitters.
Most of the villagers dislike the person
they know as Bazili Erak.
They describe him as humorless, unkind,
and oddly proportioned
for a dwarf.
He seems to be somewhat hunchbacked, making him
taller than he looks, with peculiarly long
arms and eyes as red as
his coarse hair and beard.
The quarry does legitimate business selling
stone.
Customers do
not linger in Darkshelf
for long, but if you wish, the party could
meet a sea captain or builder who has done
business with the
quarry in the past. The customer can tell
the party that either Bazili
Erak or his assistant, Glyrthiel (a female
elf),
negotiates the terms
and price for any purchase of stone.
The usual price is 300 to 500
gp per ton,
depending on the size of the stones and the agreed
date of delivery.
Several Darkshelf villagers have seen bodies
from the mudtiger at-
tacks, though no one has seen a mudtiger
and lived to tell the tale.
All the bodies have been buried, but if
the characters persist, they
can have one exhumed. However, the rotten
corpse is too decom-
posed to reveal anything useful. The villagers
who saw the bodies
when they were fresh say that the victims
were bitten deeply, as
though savaged by sharks or bears.
The Pelyra
River
The river wanders in a series of lazy curves
before joining the Sea
of Gearnat.
Its main channel is 40 to 60 feet wide and about 25
feet deep, with marshy banks. Near Darkshelf,
the river snakes
along a series of bluffs. The bottomland
along the river has plenty
of false channels and flooded caves. One
of these contains the
hidden jetty mentioned in Kwons report.
If the adventurers search
the rivers south bank for an hour or 2,
they can locate the jetty.
For random encounters
along the river, use the table for the forest,
but replace the huge spider with a mudtiger
that has 4 Hit Dice.
Although the river is only about 1/2 a mile
from the quarry as the
raven
flies, the underground tributary linking the jetty to the cav-
erns below the quarry twists and turns
for more than a mile. To
enter the quarry via the river, the characters
must swim that mile
or obtain a boat in Darkshelf.
If they use this method of entry, they
emerge in area 56
in the caverns.
ADVENTURE TROUBLESHOOTING
Low-level adventurers could wind up as
Brubgroks prisoners, par-
ticularly if they fall victim to Glyrthiels
sleep
spell. Fortunately for
the characters, Brubgrok is always looking
for new slaves. Cap-
tives are stripped of their gear and tossed
into the holding area
(area 53),
and their gear is taken to Brubgroks room (area
19).
If the characters are taken prisoner in
this way, Kwon helps them
break free. The monk
steals some gear from the armory (area 10)
and leads the adventurers to area
61
in the caverns, being careful
not to disturb the puffball fungi found
there.
APPROACHING
THE QUARRY
A twisting path, deeply rutted in the places
where the surface is
not stony, climbs the grassy slopes above
the
village of Darkshelf. <what degree of inclination are the slopes?>
A line of rocky bluffs crowns the slope.
Where the turf gives way
to the foot of the bluffs, the path splits.
One branch levels out and
runs to the quarry pit; the 2nd branch
turns and climbs sharply
toward the guardhouse.
The party is free to leave the path. They
must do so if they wish to
enter through the ventilation shaft or
the hidden jetty.
Openly Entering
Characters can try to bluff their way into
the guardhouse or quar-
ry by announcing their presence (by knocking
on the guardhouse
doors, shouting, or something similar).
Doing so alerts the closest
set of guards (most likely at areas
17
or 22 in the guardhouse or
area 34 in
the quarry), who peek out and demand to know the
partys business.
Slaving operations at the quarry are kept
secret, and any men-
tion of slaves marks the PCs as enemies.
The
guards, however, are sharp enough to pretend
that all is well. A
guard asks the party to wait at the bridge
while he calls his supe-
riors. The guard then alerts the garrison
at areas 6 and 17
in the
guardhouse, Glyrthiel at area
18
(or elsewhere in the quarry), <link: Glyrthiel>
and the guards at area
34
in the quarry. Eventually, Glyrthiel
and a few guards appear and conduct the
visitors to area 5 in
the guardhouse, where she attacks the group.
Because the elf is
often busy supervising or leading patrols,
it might take anywhere
from a few minutes to 2 hours or more for
her to arrive (see the
notes for area 18).
If the PCs pretend to be interested in buying
stone,
they are eventually conducted to area
5 for a conference. Glyrthiel
negotiates the sale, asks questions about
how the stone will be
used, and asks the characters to pay at
least twice the going price
(1,000 gp
per ton). If the adventurers accept that deal, Glyrthiel
knows they are not legitimate buyers. She
also knows the charac-
ters are bluffing if they cant discuss
stoneworking
knowledgeably.
The elf does NOT agree to start work on
any project unless the cus-
tomer pays at least 20% of the total fee
in advance. She
does not expect new customers to have the
down payment with
them, but she still pushes and tries to
get it before they leave the
conference room.
If the party fools Glyrthiel, the elf promises
them a delivery date,
offers them a meal, and bids them farewell.
The characters can get
a short tour of the quarry if they insist.
Glyrthiel gives tours only dur-
ing the daylight hours; she and a guard
lead the characters out of
the guardhouse through area
1
and through the quarry pit. After
the pit, Glyrthiel shows them the main
gallery (area 34) and 1
of the dig sites (area
39)
in the quarry proper. Groups that insist
on seeing more are attacked. Once the tour
is over, Glyrthiel leads
the characters back through the pit and
sends them on their way.
GUARDHOUSE (GENERAL
NOTES)
Brubgrok had the guardhouse built when
he took over the quarry.
It ostensibly serves as a residence and
protects the quarry and its
workers from bandits
and marauding creatures. In truth, the guard-
houses main purpose is to prevent slaves
from escaping. It in-
cludes areas for the slavers and their
customers to plan shipments
and bargain for slaves.
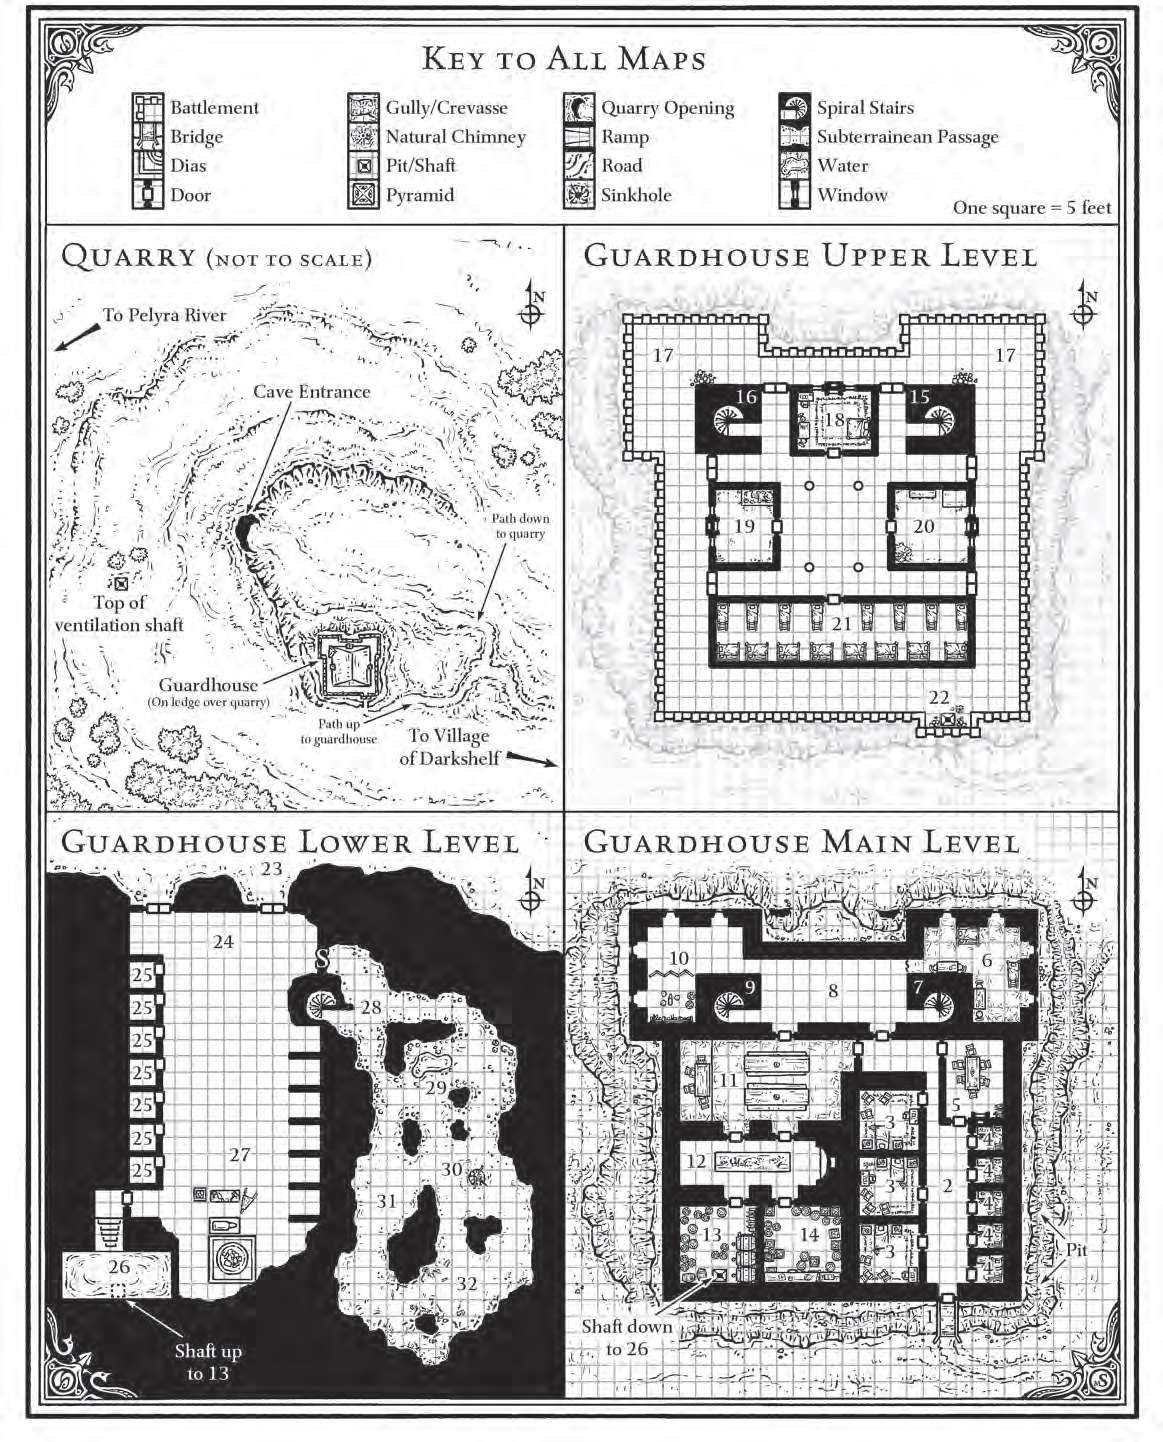
The guardhouse has been built against the
quarry pits south wall,
with its lowest floor at the level of the
pit, the main floor even with
the pits top, and an upper floor above
that.
The lowest level of the guardhouse is carved
from the south quarry
pit wall (or finished from natural caverns
in the walls). The main
and upper levels are constructed mostly
from granite and lime-
stone from the quarry. The stones vary
from fist-sized shards to
chunks about the size of a human torso,
all irregularly shaped.
Exterior walls and major interior walls
are 5 feet thick. Minor inte-
rior walls are about 9 inches thick. Though
fitted together well, the
irregular stones make for somewhat rough
surfaces that thieves (or
other characters with climbing
ability) can scale with the normal
chance for success.
Inside, most of the guardhouse is dark,
dank, and stuffy, though
chambers with exterior windows get extra
light
and air. Oil lamps
set roughly at 15-foot intervals in chambers
and passages provide
illumination. The lamps are made of iron
and mortared into the
stone. Its possible to wrench off a lamp
with a successful Bend
Bars/Lift Gates roll. However, anyone doing
so must roll 1d6. On a
roll of 13, the character spills the oil,
and if the lamp is lit, the char-
acter is covered in flaming oil and takes
212 points of damage, <fire
damage heals slower>
plus an additional 16 points the next
round as the oil burns out.
Floors inside the guardhouse are stone
and fairly smooth, allowing
normal movement. Ceilings are about 12
feet high.
Interior doors are made of planks about
3 inches thick, with wrought-
iron fittings.
They open easily (no roll required) unless the encounter
key specifies otherwise. Details on the
guardhouses exterior doors
are included in the encounter keys where
they are located.
Windows are mere slits in the walls about
6 inches wide and 5
feet high. They have no glass, but most
are covered with flaps of
thin, translucent parchment.
Guardhouse Personnel
Roster
The denizens of the guardhouse move around
once they realize
they are under attack. The DM might find
it handy to cross them
off this list as the party defeats them.
Guards and named NPCs that are captured
and interrogated ad-
mit that Bazili Erak is using the quarry
as a cover to mask his secret
dealings with slavers. However, only Brubgrok
and Glyrthiel know
Bazili Erak is an alias as well as the
details of the slaving opera-
tion (see Concluding
the Adventure, page 25).
| Daylight Resident | Number |
| Brubgrok (1-2 in 6) | 1 |
| Glyrthiel (1-2 in 6) | 1 |
| Goblin | 16 |
| Human sergeant | 1 |
| Human guard | 10 |
| Human slave | 28 |
| Nubgrod | 1 |
| Snikscab | 1 |
| Uzgrod | 1 |
| Wartslag | 1 |
| Worg | 3 |
| Zodznog | 1 |
-
| Night Resident | Number |
| Brubgrok (1-2 in 6) | 1 |
| Glyrthiel (1-2 in 6) | 1 |
| Goblin | 24 |
| Human sergeant | 1 |
| Human guard | 6 |
| Human slave | 28 |
| Nubgrod | 1 |
| Snikscab | 1 |
| Uzgrod | 1 |
| Wartslag | 1 |
| Worg | 3 |
| Zodznog | 1 |
| 1. | 2. | 3. | 4. | 5. | 6. | 7. | 8. | 9. | 10. |
| 11. | 12. | 13. | 14. | 15. | 16. | 17. | 18. | 19. | 20. |
| 21. | 22. | 23. | 24. | 25. | 26. | 27. | 28. | 29. | 30. |
| 31. | 32. | 33. | 34. | 35. | 36. | 37. | 38. | 39. | 40. |
| 41. | 42. | 43. | 44. | 45. | 46. | 47. | 48. | 49. | 50. |
GUARDHOUSE: MAIN LEVEL
Most of the quarrys business, both legitimate
and shady, is con-
ducted here.
| 1. | 2. | 3. | 4. | 5. | 6. | 7. | 8. | 9. | 10. |
| 11. | 12. | 13. | 14. | - | - | - | - | - | - |
GUARDHOUSE: UPPER
LEVEL
The upper level contains a few guardposts
and living quarters for
the principal residents. Only the central
section has a roof; the rest
of the level is open to the sky.
A crenellated parapet
rings the whole level. The crenellations are
about three feet highjust tall enough
for the guards up here to
remain out of sight if they hunker down
behind them. A creature on
the parapet gains 50% cover (+4 bonus to
AC)
against
any attack that has to cross the parapet.
| - | - | - | - | 15. | 16. | 17. | 18. | 19. | 20. |
| 21. | 22. | - | - | - | - | - | - | - | - |
GUARDHOUSE: LOWER
LEVEL
The lower level houses most of the animals
and many of the goblins
that toil in the quarry. The areas in this
level are primarily natural
caverns
or spaces hewn from the rock. Unlike in the rest of the
guardhouse, the
areas here have no windows or oil lamps (except
where noted in the text). Phosphorescent
fungi growing on the
walls and ceiling provide dim light.
| - | - | 23. | 24. | 25. | 26. | 27. | 28. | 29. | 30. |
| 31. | 32. | - | - | - | - | - | - | - | - |
QUARRY (GENERAL
NOTES)
The quarrys walls are rough hewn and a
trifle damp. For purposes
of climbing, walls are somewhat rough and
slightly slippery (see <climbing, WSG>
page 19
of the DUNGEON MASTERS GUIDE), which allows
climbing characters to travel 6 per round,
with double the normal <"?>
chance for a fall. Ceilings are 12 to 18
feet high (larger chambers
are taller). The air
throughout the quarry smells musty due to the
dampness.
The guards and goblinoids in the quarry
know that Bazili Erak is
using the mining operation to conceal his
slave-trading activities,
and they are aware that evil clerics
are holed up in the caverns. <Evil Priest, DLA>
However, they dont know Bazilis true
name or that hes a half-orc,
they dont know any of Bazilis contacts
in the slaving operation,
and they dont know why Bazili is sheltering
the clerics or what
their intentions are.
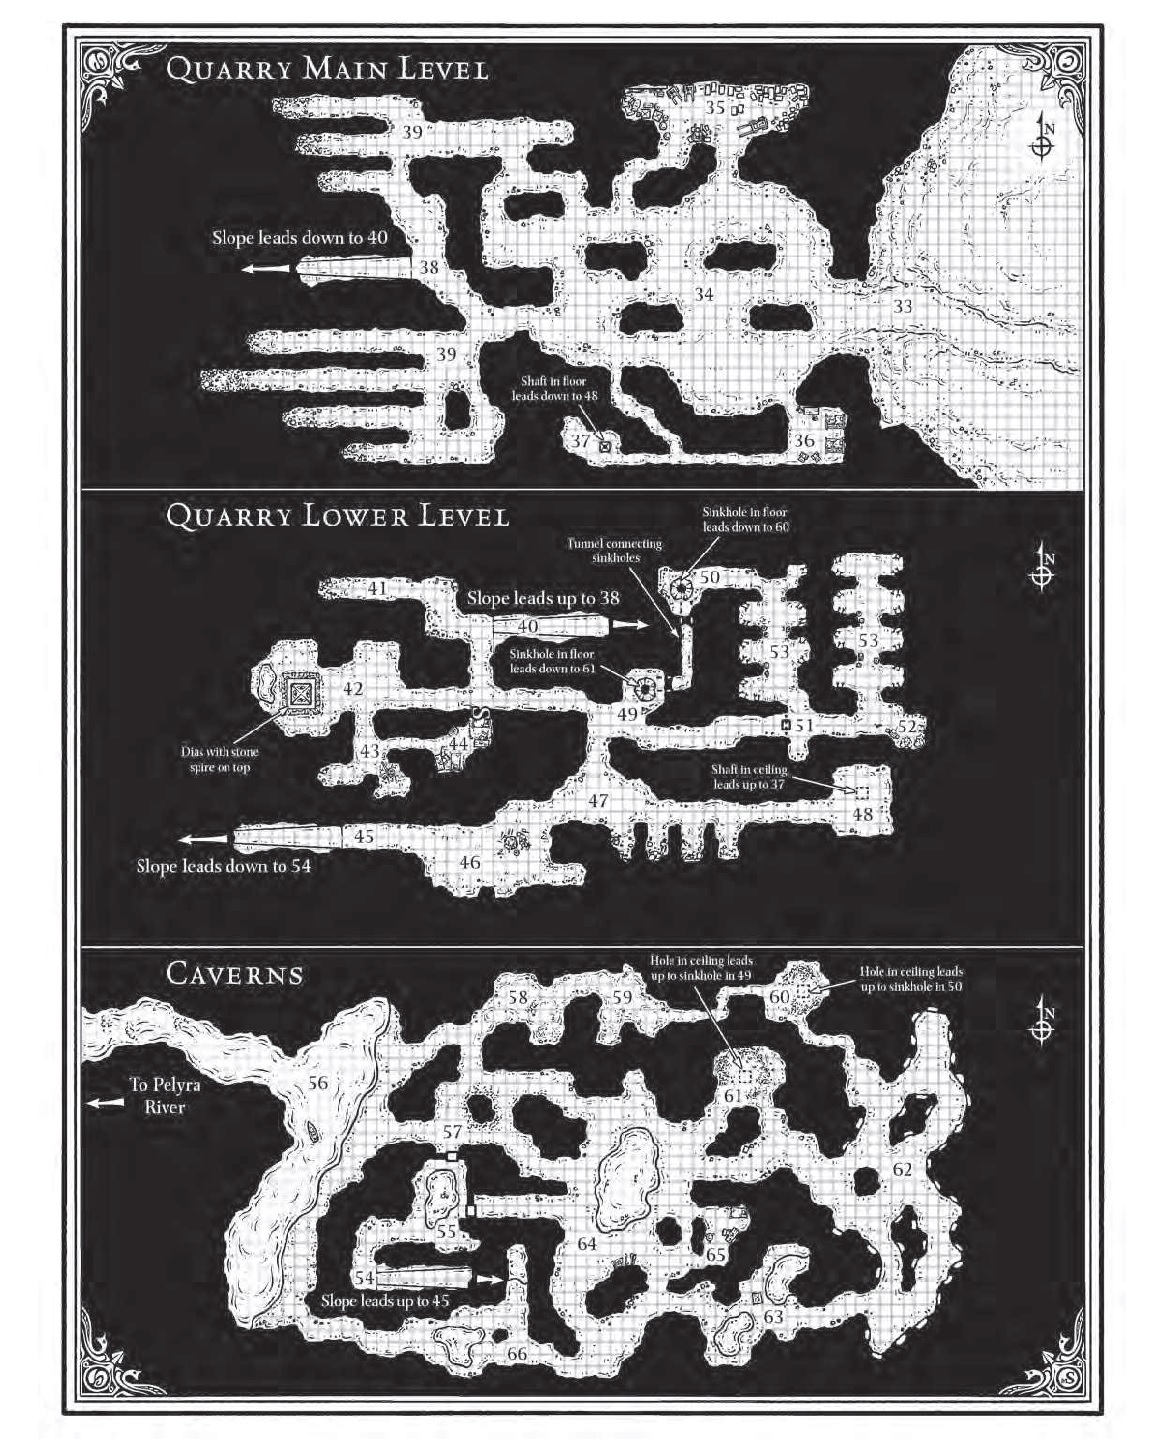
QUARRY: MAIN
LEVEL
The tunnels here are a continuation of
the quarry pit outside; the
workers simply followed the outcropping
of stone from the surface
underneath the hillside.
Luminous fungi
on the walls provide dim light throughout
the level.
| - | - | 33. | 34. | 35. | 36. | 37. | 38. | 39. | - |
QUARRY: LOWER
LEVEL
This level is similar to the main level
but is darker, clammier, and
cooler. Luminous fungi grows in patches
on the walls. Characters <effective temperature = x>
without infravision
can see only 20 feet in the poor light. Several
places have no fungi, as noted in the area
descriptions.
| - | - | - | - | - | - | - | - | - | 40. |
| 41. | 42. | 43. | 44. | 45. | 46. | 47. | 48. | 49. | 50. |
| 51. | 52. | 53. | - | - | - | - | - | - | - |
QUARRY: CAVERN
LEVEL
This level of the quarry consists almost
entirely of natural caves and
pools. The slavers do not use the area
much except to smuggle
slaves
in and out, though Brubgroks <evil
priest> allies breed mudtigers
in some of the pools.
The caverns are
fairly coolabout 60? F. The
water here
is even
colder; anyone wading or swimming in the
caverns risks exposure
after 5 minutes. The character must make
a System Shock roll with
double the usual chance of failure plus
an extra 5% chance of failure
for every System Shock roll the character
has made in the previous
24 hours. A failed check deals 1 point
of damage and saps
1 point of Strength
and 1 point of Dexterity. A character
who remains
in the water must make a new System Shock
roll each round.
Damage
from the cold can be healed through the
usual means.
Ability score loss can be reversed only
through REST. For each day
of complete rest, the chilled character
regains 1 lost point from
each reduced ability score.
The caverns are too damp and cold to support
the luminous fungi
that lights the quarrys upper levels.
All areas are dark unless noted
otherwise. All boxed read-aloud text assumes
that the characters
have infravision
or are using some kind of artificial
light.
Cavern
walls are natural limestone unless otherwise noted. They
are somewhat rough (with many fissures,
knobs, and folds) but slippery.
Climbing
characters travel at 3 per round, with ten times the
normal chance of a fall. Ceilings in the
caverns are roughly twice
as high as a passage or chamber is wide.
| - | - | - | 54. | 55. | 56. | 57. | 58. | 59. | 60. |
| 61. | 62. | 63. | 64. | 65. | 66. | - | - | - | - |
CONCLUDING THE ADVENTURE
Once the PCs defeat Brubgrok
and Glyrthiel and
free the slaves
in areas 12, 21, 24,
and 53 (including Kwon), the
adventure is effectively over. The characters
can return to Darkshelf,
report back to Neistor, and claim their
reward of 500 gp.
Any surviving humans
or humanoids in the complex flee, taking
whatever treasure they can carry. The undead
and other monstrous
creatures on the cavern level remain.
If the characters avoid the guardhouse
and focus their attention on
the mines, enemies that escape from them
might flee to the guardhouse
to alert the forces there. In that event,
Brubgrok or Glyrthiel
might lead a force of humans or goblins
into the mines to hunt
down the interlopers, leaving at least
1/2of the garrison behind
to watch over the guardhouse.
The characters might need to make several
forays into the quarry
and guardhouse
to finish exploring the whole complex. If Brubgrok
survives their first attack, he summons
reinforcements to fortify his
weakened defenses. If the adventurers prove
to be a serious threat,
Brubgrok and Glyrthiel consider abandoning
their operation and
fleeing for their lives, but ultimately
they decide to stay. They fear
reprisals from others in the slaver network,
so they make a stand
instead.
Against the Slave
Lords!
Brubgrok's
links to the larger slaver network are well protected,
but the party can pick up some threads.
Capturing Brubgrok or
Glyrthiel
alive and forcing them to talk reveals that they have been
using the quarry as cover while secretly
transporting slaves to
Highport, a
nearby coastal city that figures prominently in module
A1, SLAVE PITS
OF THE UNDERCITY. If the characters
do not
wish to interrogate the prisoners themselves,
they can take the villains
to Darkshelf and
turn them over to Neistor, who obtains the
information.
The <evil priests> are the only other
creatures in the quarry who have
a clear idea of how Brubgrok's operation
really works. They occasionally
serve as accountants and scribes
for the
half-orc, and they
can reveal the link
to Highport and the connection to the larger
slaver organization.
Even if the characters do not manage to
capture the important slavers,
their discoveries at the quarry help to
reveal (or at least hint
at) the full extent of the slave network.
Officials along the coast of
the Sea
of Gearnat become wary, and they begin piecing together
stories from escaped slaves, survivors
left for dead after attacks
by bandits
or pirates, and merchants
and adventurers. Eventually,
all of this information points to the slavers
operating in Highport
(module A1), though reaching this conclusion
might take
several months.
CREDITS
Designed and Written By: Skip Williams
Development: Christopher Perkins
Editor: Ray Vallese
Art Direction: Jon Schindehette
Cover Art: Brian Snoddy
Art: Kim Feigenbaum, Rich Longmore
Cartography: Mike Schley